Electronics
My favorite thing about 3D Printing – pt 2
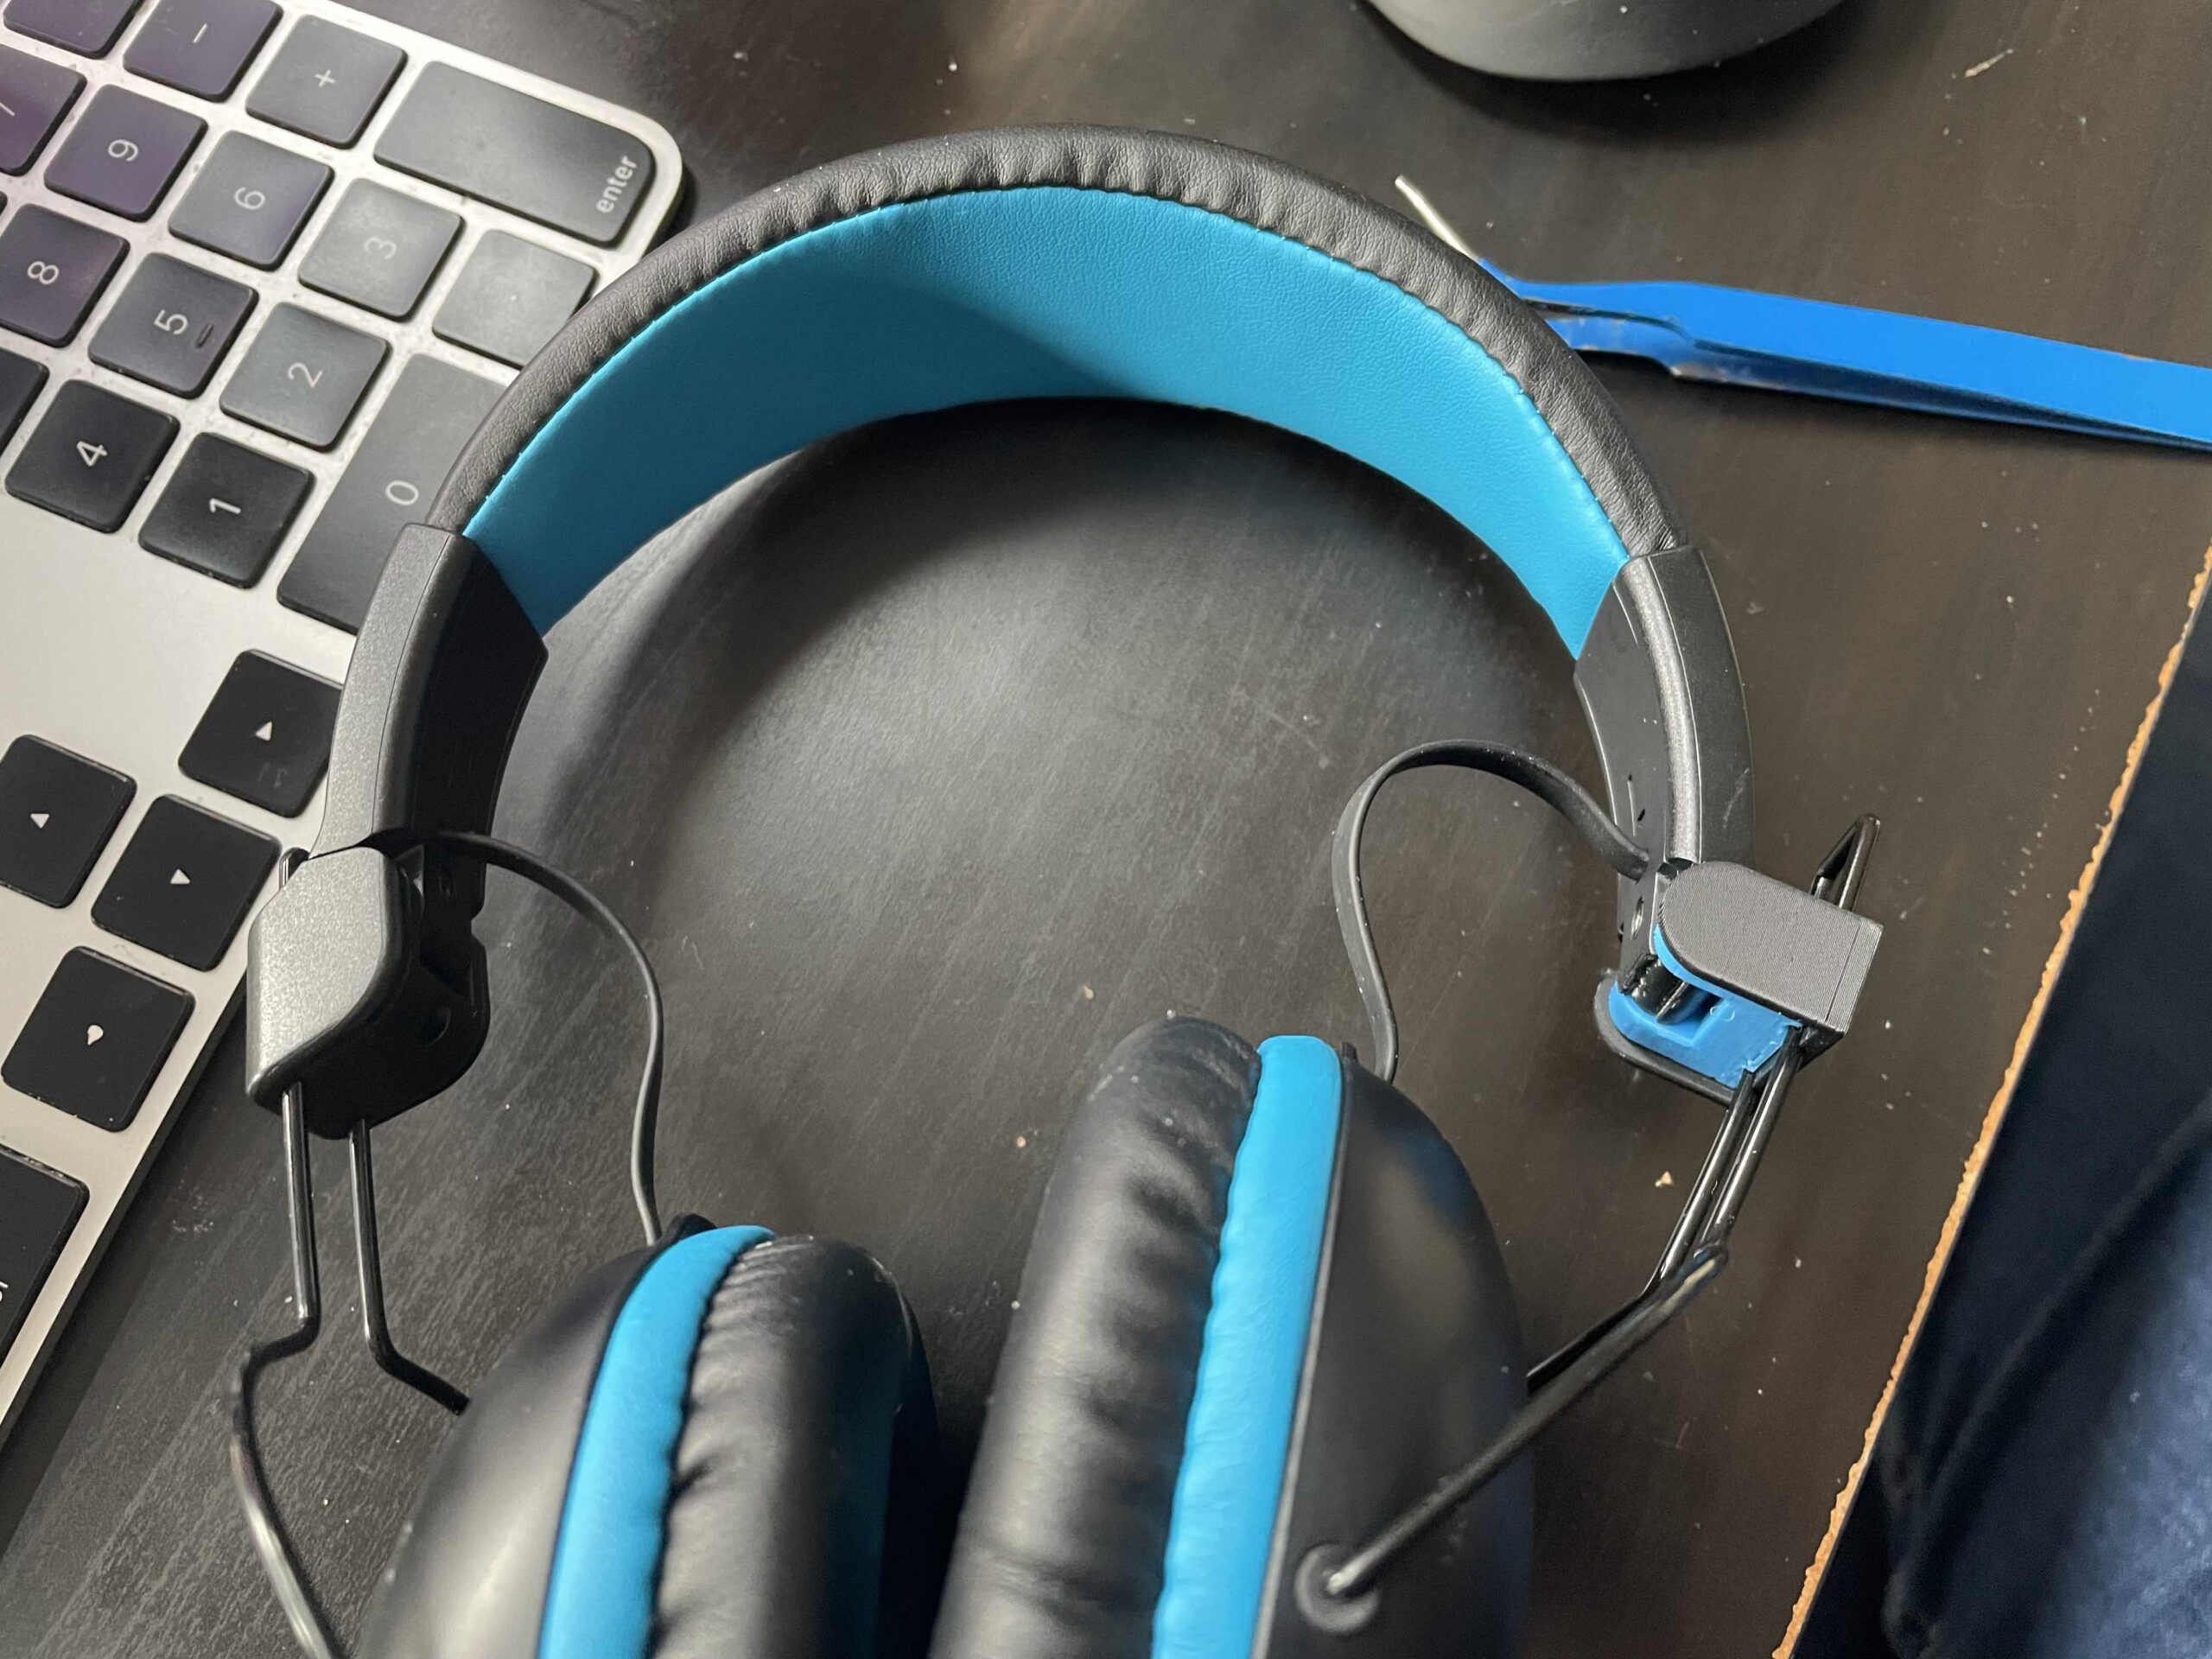
A few days ago I found my kid's headphones on the floor - the right earphone was dangling awkwardly away from the headband. It got stepped on, or dropped, or [...]
Christmas Lights Snowflake Prop!
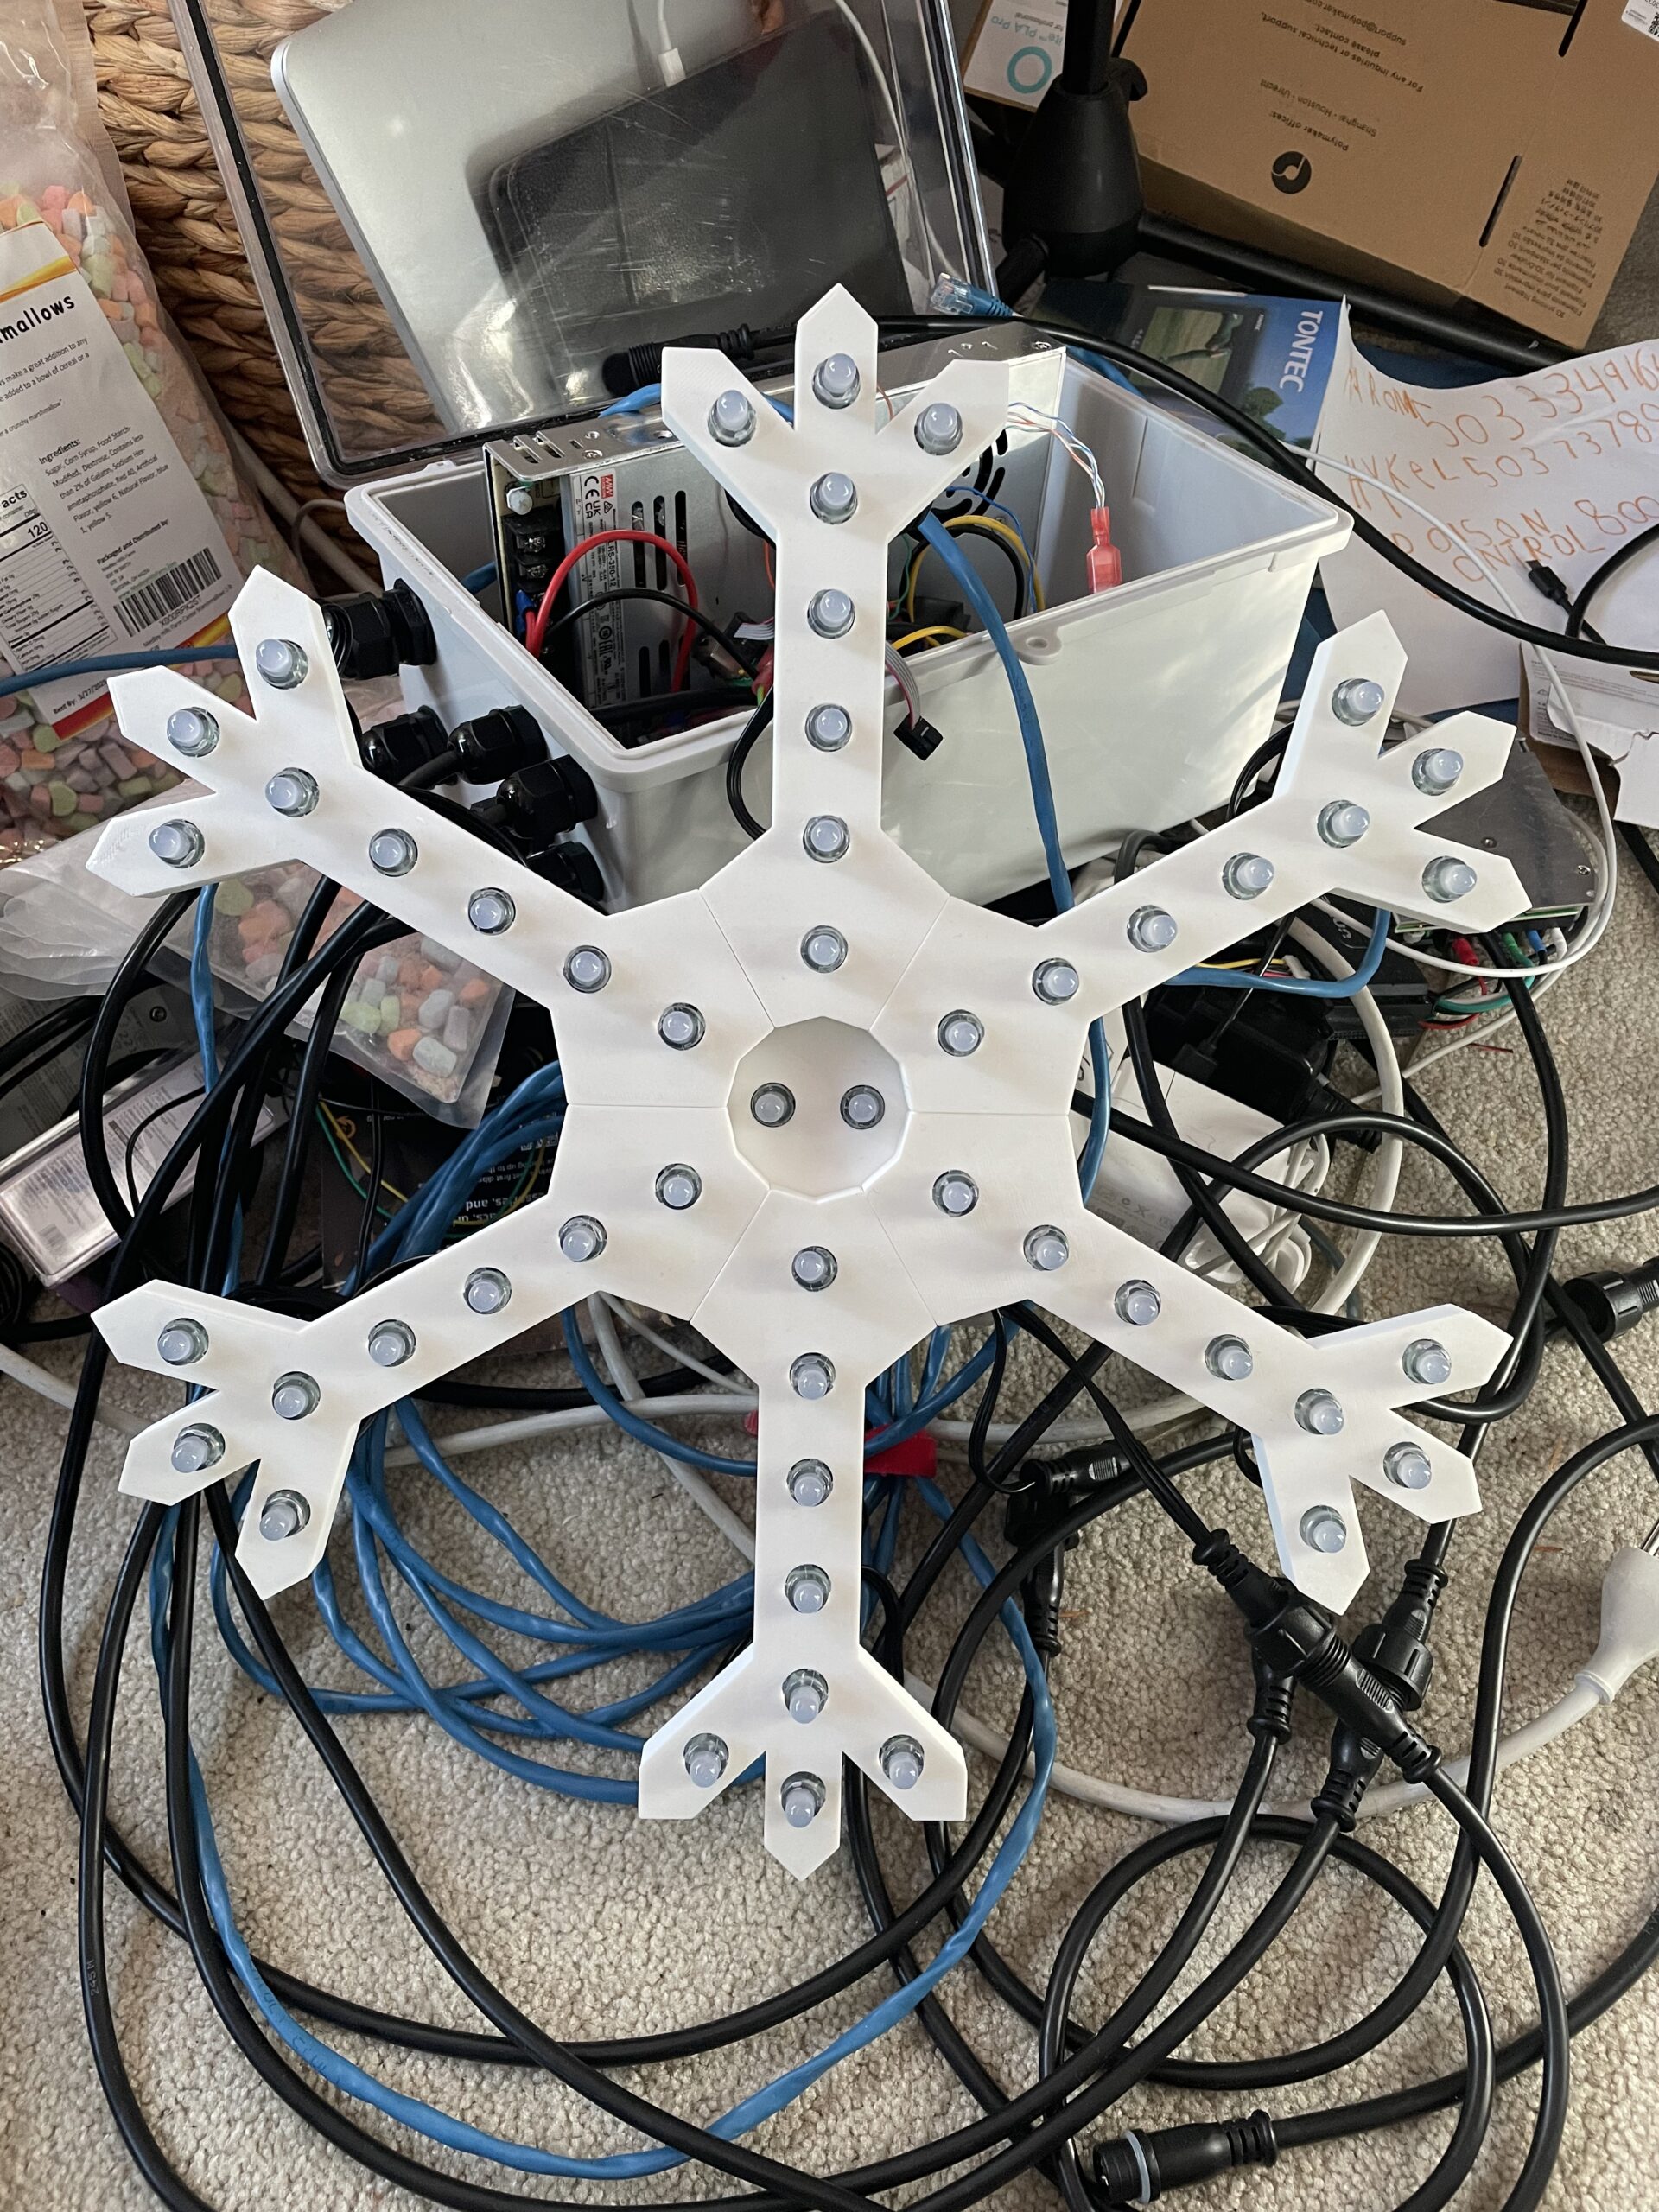
A few years back as I was starting to build out my Holiday light setup, I remember watching a video where the host said "3D printing is what really takes this [...]
The Macintosh SAO
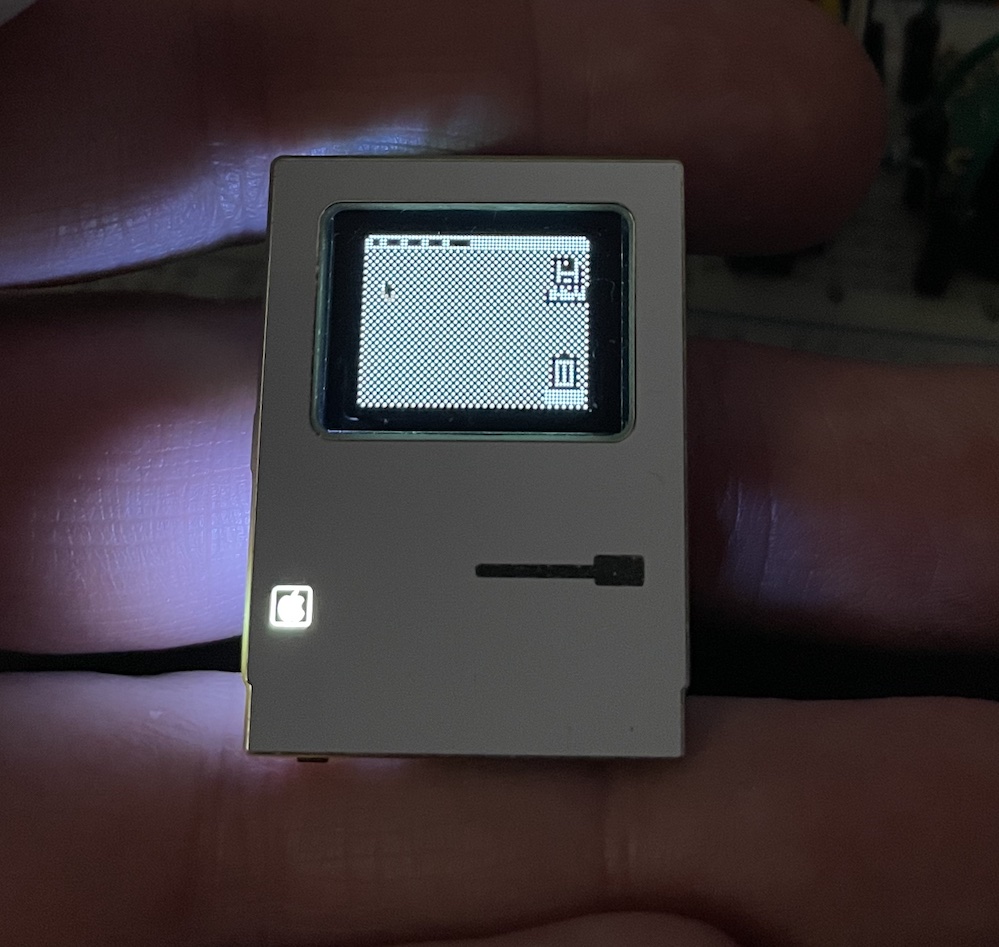
I attended the 2024 Hackaday Supercon conference this year. I wanted to take something special to share. So I made a little electronics badge that acts a [...]
Christmas Lights 2021!
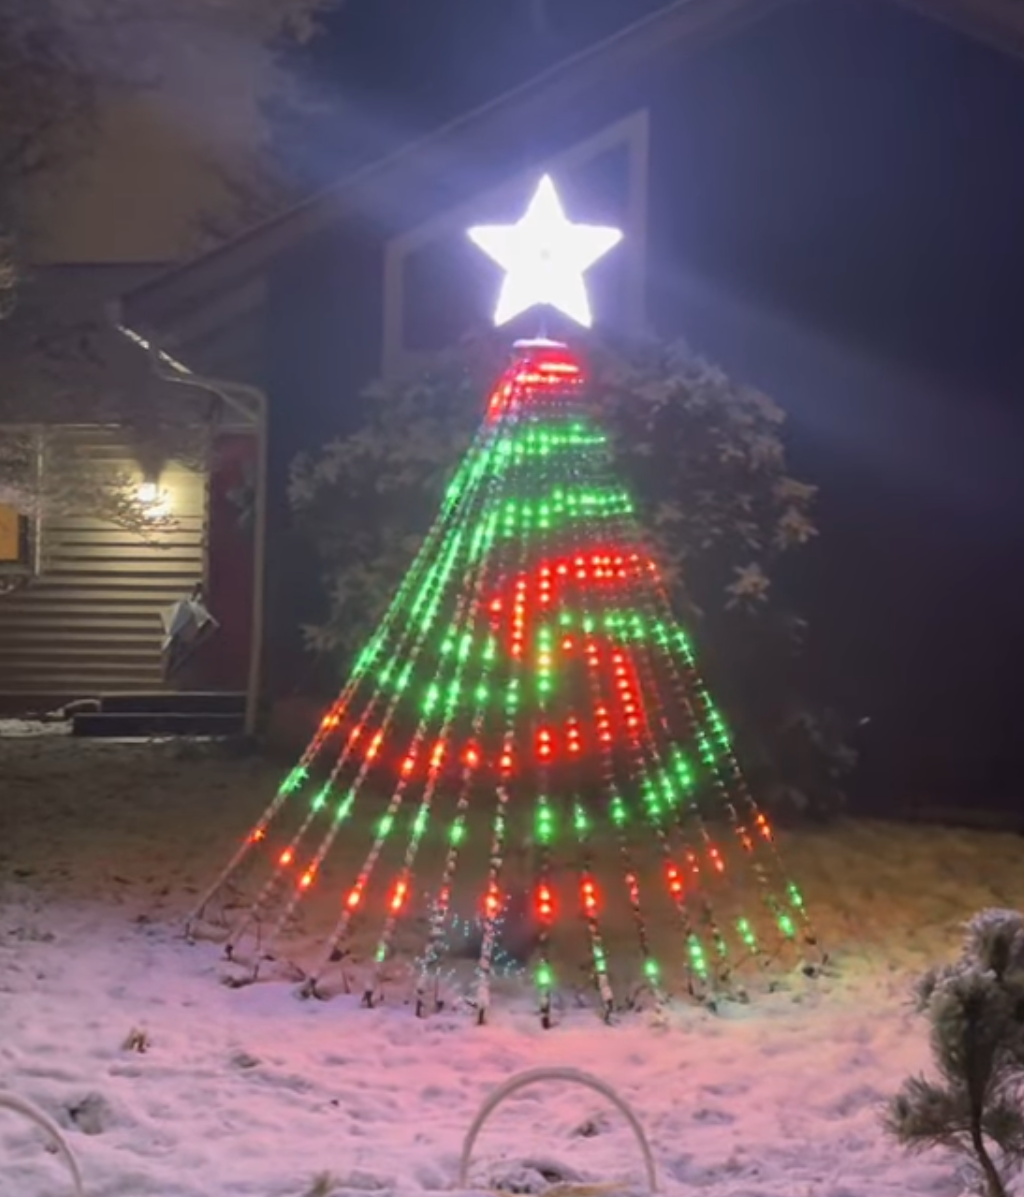
You may recall last year I took my first step into Sequenced, animated Christmas lights with some arches and simple light strings. I had some grand plans this [...]
Programming an nRF52 on a Mac
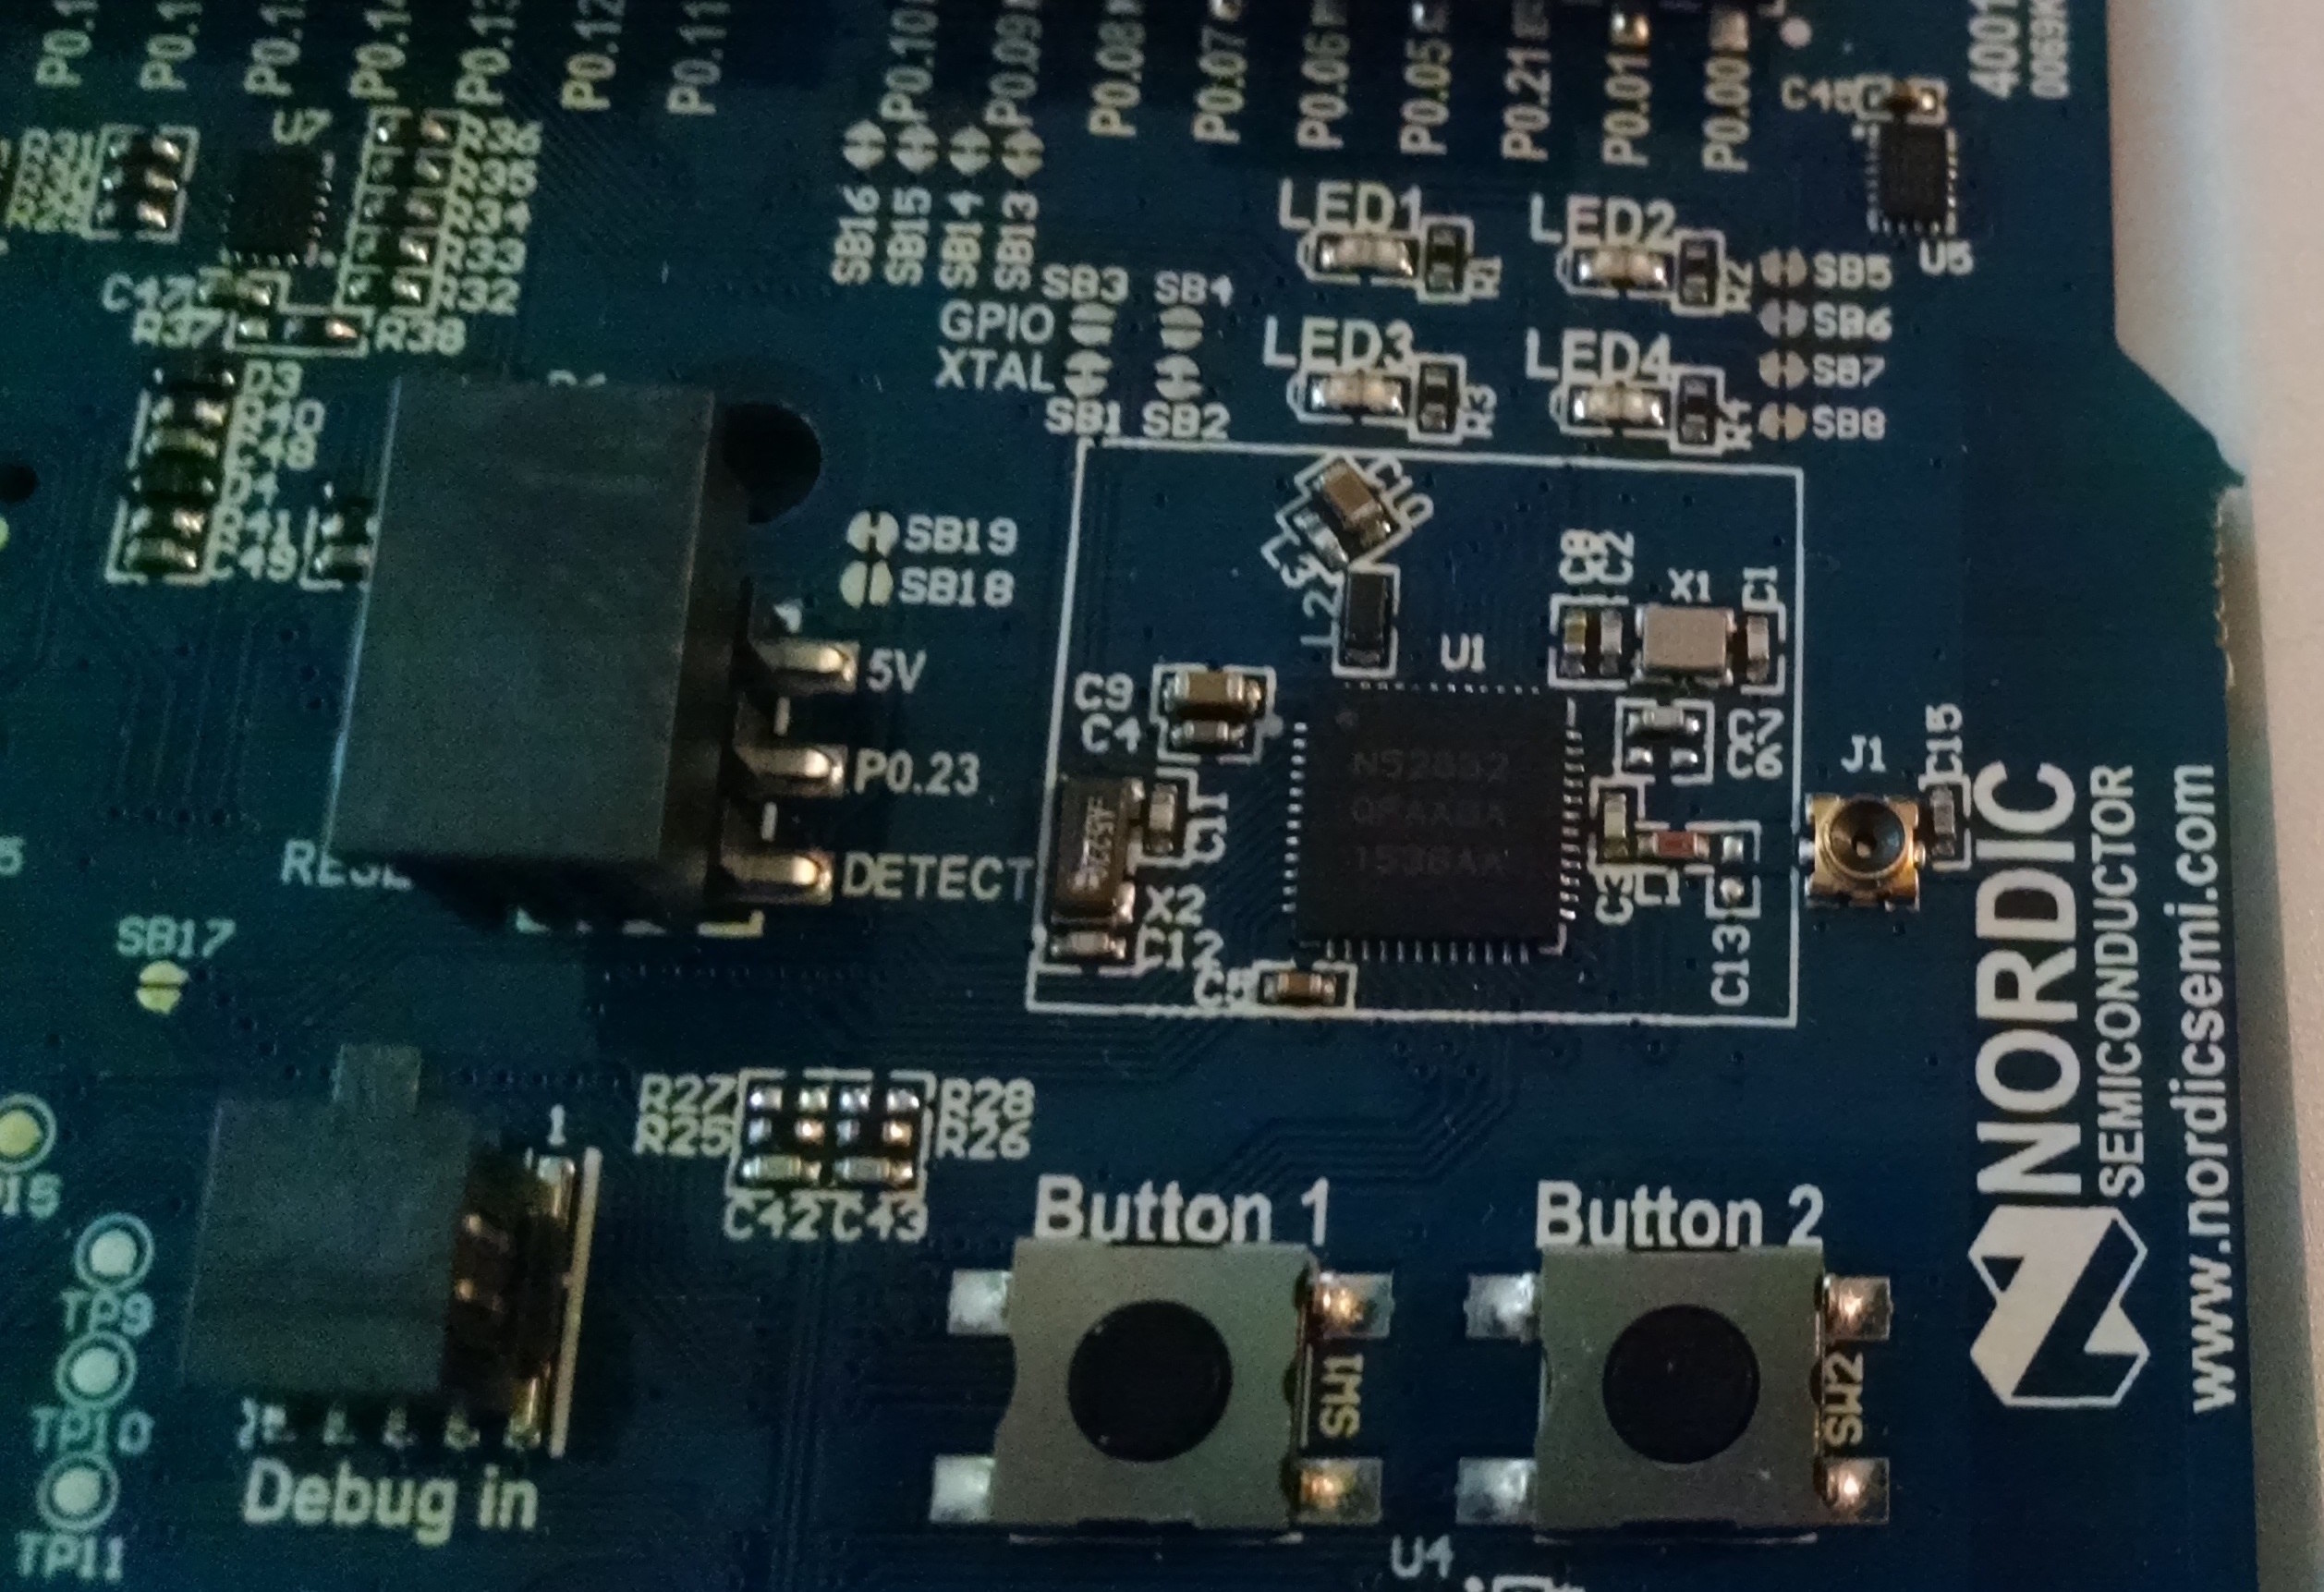
Several months ago, I went to promotional conference for a microcontroller on a whim. I'd heard about it the night before, and after some investigation [...]
MakerFaire Project (2015) – Part 1
This started out as a "Project of the Week" post, but As it started to take form, and started to stretch beyond a week, I decided I wanted to make a more [...]
Last Minute Halloween
I've always been very taken with Halloween setups. The orchestration, the excitement, and creativity all lead to a fun expression of the holiday. Halloween has [...]
My First Printed Plastic Part
I have been working at this for months. A couple of years ago, I found out about the RepRap project. The idea behind the reprap (if you haven't talked to me [...]
A Beginner’s guide to making an Arduino Shield PCB
(This tutorial has gotten really popular recently, and I'm very pleased that so many people are interested. I learned all of this stuff while working on my [...]
A little shipping experiment