A couple of years back, one of my favorite podcaster/writer/tour-de-forces, Andy Ihnatko released a commentary track for the 1954 holiday classic White Christmas. It’s a hilarious and fascinating dissection of the film and since I heard it, I’ve wanted to figure out a way I could add the commentary support to my copy of the film while maintaining the original audio. This past Christmas I put a lot of work into it but ran out of steam because of other projects. Today, I finally got it all squared. Because I’ve worked hard to figure it out, I’m hoping you won’t have to.
A warning: Your experience may vary from mine. I’m using the tools available to me on the platform available to me. I’ll do my best to make everything clear, but this process may not work for everyone. Additionally, this is not a quick process and is probably not something you want to do for every film that you want to watch with RiffTrax for instance. However, it should work. This solution requires a MKV file that you’ll mix down to an M4V (or not).
Author’s note: I accidentally labeled my file as ‘White Christmas (1958)’, the film was released in 1954. All my screen caps were already done so I didn’t bother going back to fix them.
Things you will need;
To do this, I used a handful of free, and wonderful pieces of software that deserve your support and praise. Amongst them are:
- MakeMKV – This is for turning a disc into an MKV.
- mkvextract – This is for extracting the audio track out of the movie.
- Audacity – This is for mixing down the commentary track to the soundtrack.
- mkvtoolnix (I used mkvtoolnix-gui) – This is for joining the commentary audio back into the film.
- Handbrake – This is for turning the MKV into an M4V
Get your film into a format you can work with..
You know those Russian nesting dolls that stack one within another? They’re called matryoshka dolls, and the MKV (Matroska) video format is named after them. This is because it’s really a container that holds a bunch of media types that all tie together. MKV is convenient because it lets us pop in our extra commentary track.
I use MakeMKV to extract movies off of discs into an MKV format.
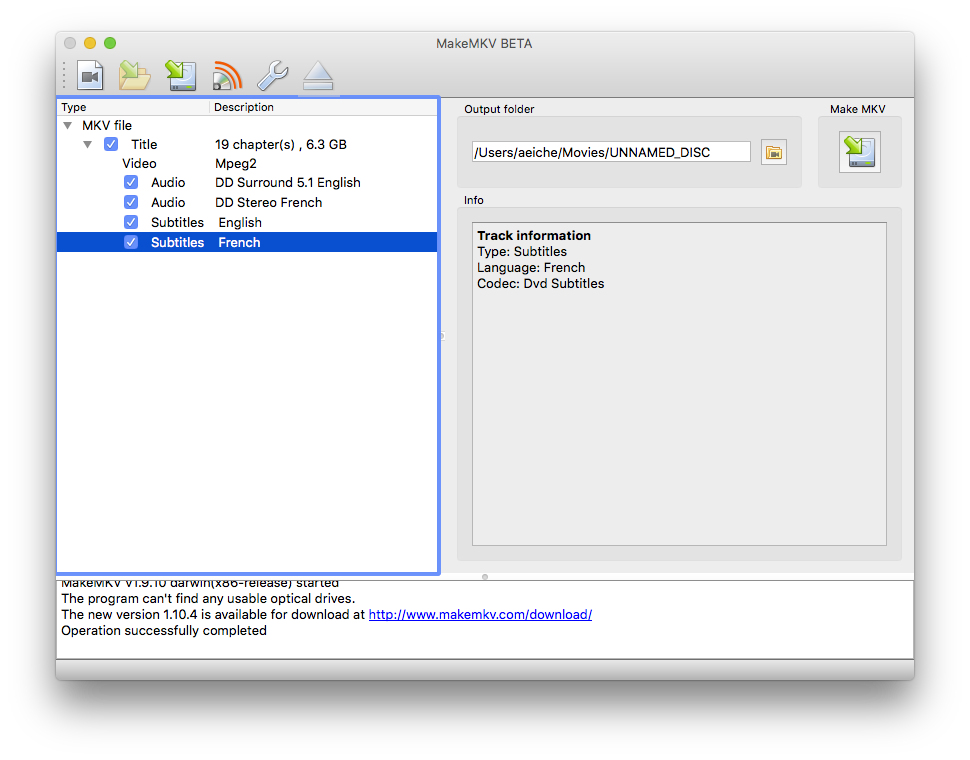
Extract the film’s Audio track that you want to mask.
This is usually the track that your commentary works over – that’s very often English, but if somebody (or you) produced a French commentary for instance, make sure that you extract the French audio from your source. I can’t remember how I did this when I did it. Originally I did it back in December and it’s been months. So here’s a solution you can use:
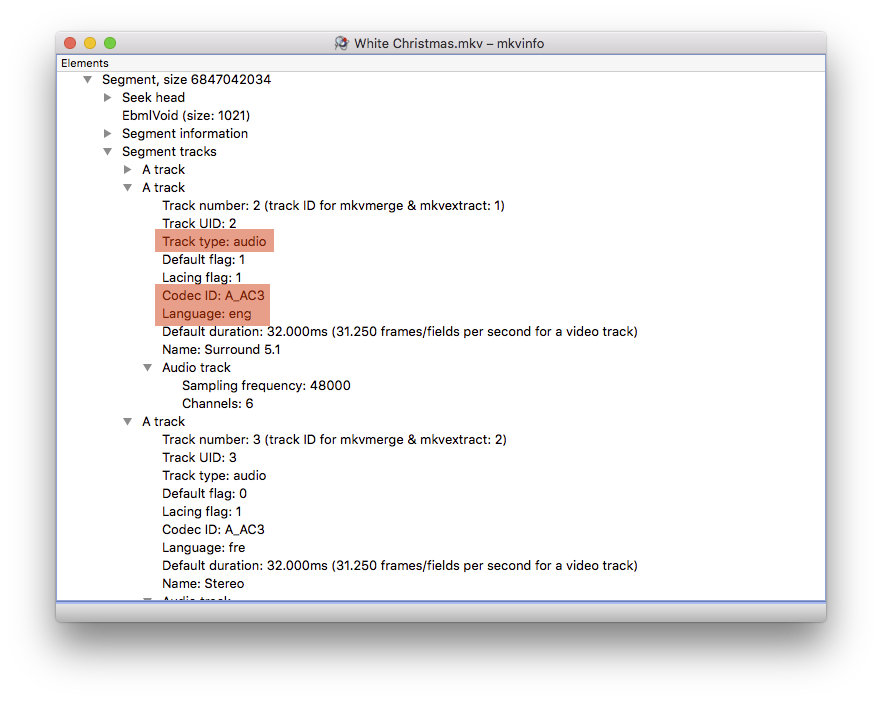
mkvinfo-gui White_Christmas.mkv
This should pop open an info window that will show you all the data that you can get out of the MKV.
The key thing that we’re looking for is the eng language and that this is an aac track.

From there, we’ll use mkvextract to get the piece that we want.
mkvextract tracks "White Christmas.mkv" 1:white_christmas_audio.aac
This will get you the Movie’s sound track in a convenient AAC file (Or whatever you output it to) Pay attention to the number in front of the file name. You’ll notice in the information that it says it’s Track number 2, but the id for mkvextract is 1. When I did this, I first ended up with the French language track.
Mix in your commentary track
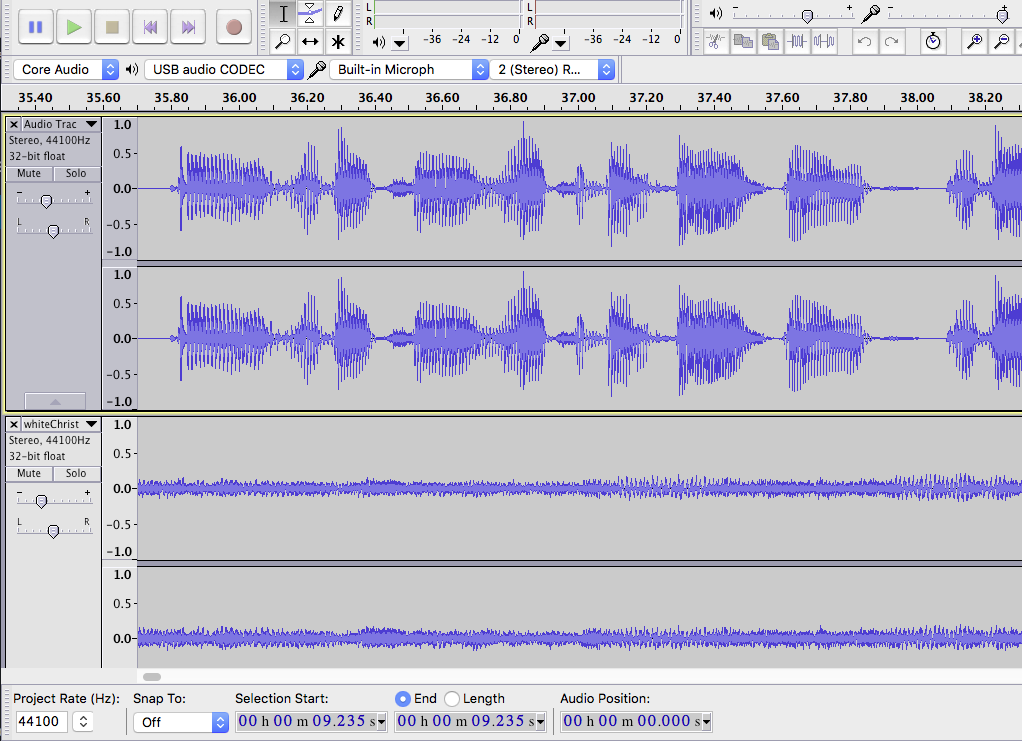
The next step is kind of the most time consuming. Now you have to take your commentary track, add it to the movie audio track. During this step you need to correctly position your commentary track in sync with your movie’s audio track. Some commentary tracks provide good sync points. In the case of Andy Ihnatko’s track, he provided a visual cue. I had to position, mix down, and try it a few times to find the right location. Additionally, I recommend that you adjust the gain on the movie’s audio track down. You want to hear what’s happening in the film, but not at the same volume as the commentor(s). This is also a by-ear activity. Give it a few shots and see how you feel about the output. Save it out to an AAC file.
Multiplex in the audio track

Multiplexing is a fancy term for adding two or more things together. Here you’re going to take your MKV file and put your audio track in it. After adding in your track, you’ll find that mkvtoolnix doesn’t know what language it’s in, and it doesn’t know what to call it. First, start the multiplexing and let the new track be added to the MKV container. Then you can click on the “Header Editor” and update the language and title.
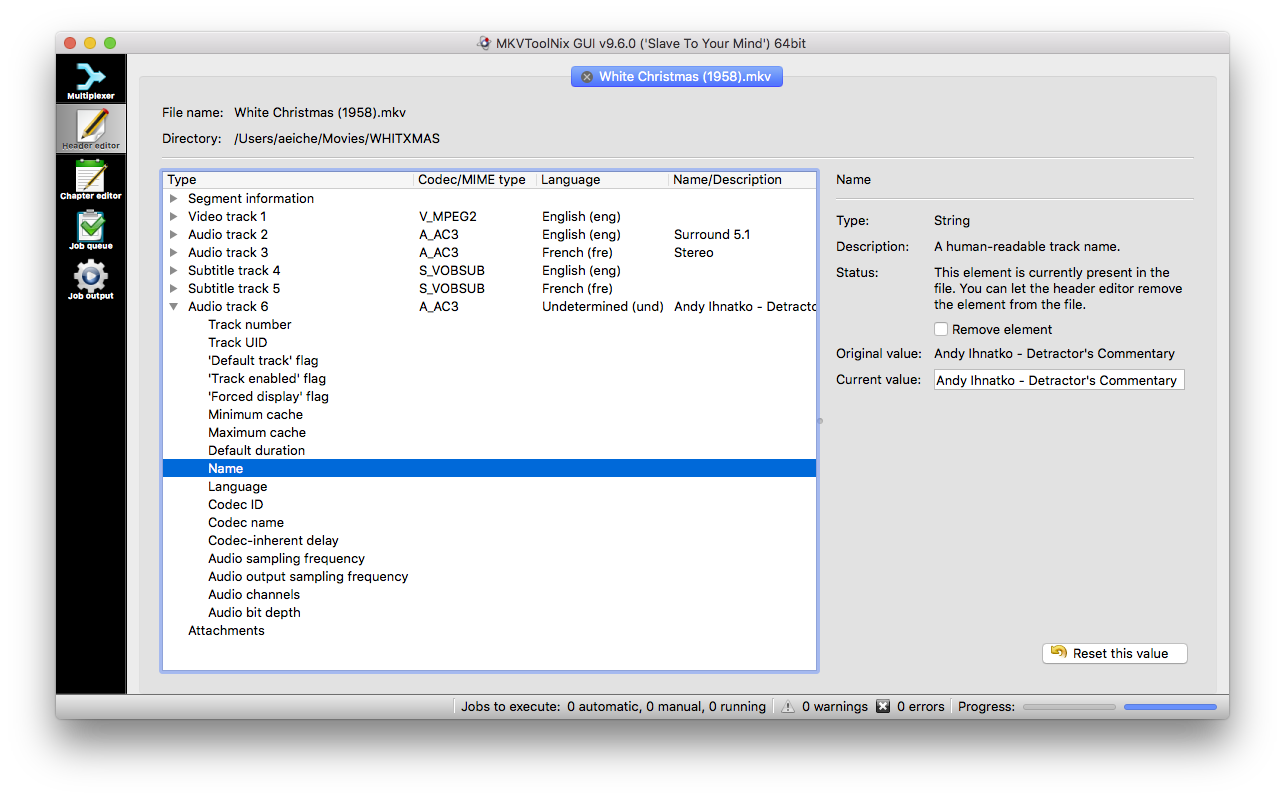
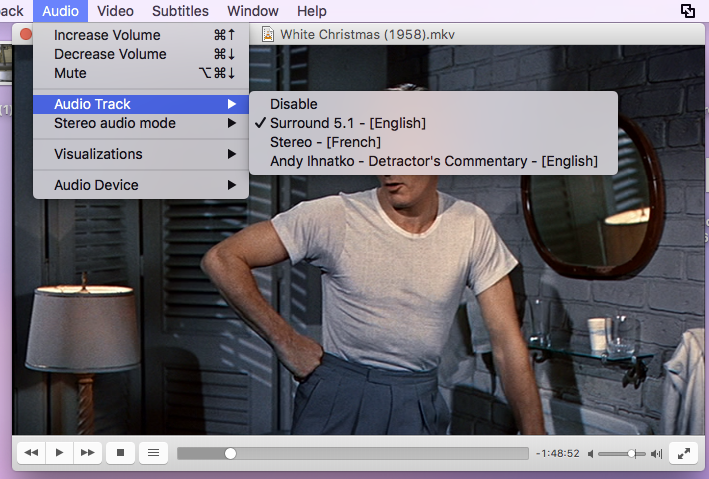
Now that that’s done, you should be able to see it in your favorite MKV viewer:
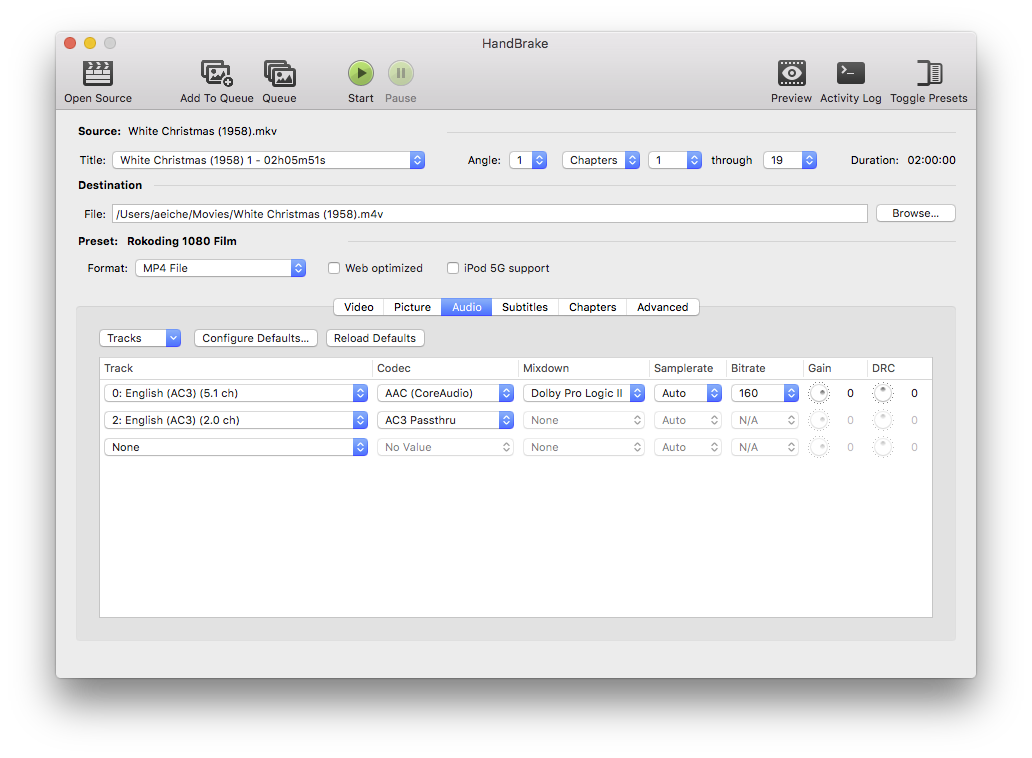
Convert into a friendlier format:
The whole purpose of this exercise for me, was to get the commentary track into a place where I could view it without having to have a second device playing the commentary. In my case, that’s Plex running off of my NAS. Plex is capable of streaming an MKV, but over wifi and on such a low power chip as the Atom in my NAS, it gets jerky and slow. Instead I want to give Plex something it works natively in: MP4. This is where Handbrake comes in. Just like converting an MKV to an MP4 otherwise, you only need to make the new audio track an option on the file:
That’s it! If you have questions, please post in the comments. I’ll do my best to respond to them. Happy commentarying. (Yes, it’s a word… now)