 For the past few years, my brother and I have been pranking
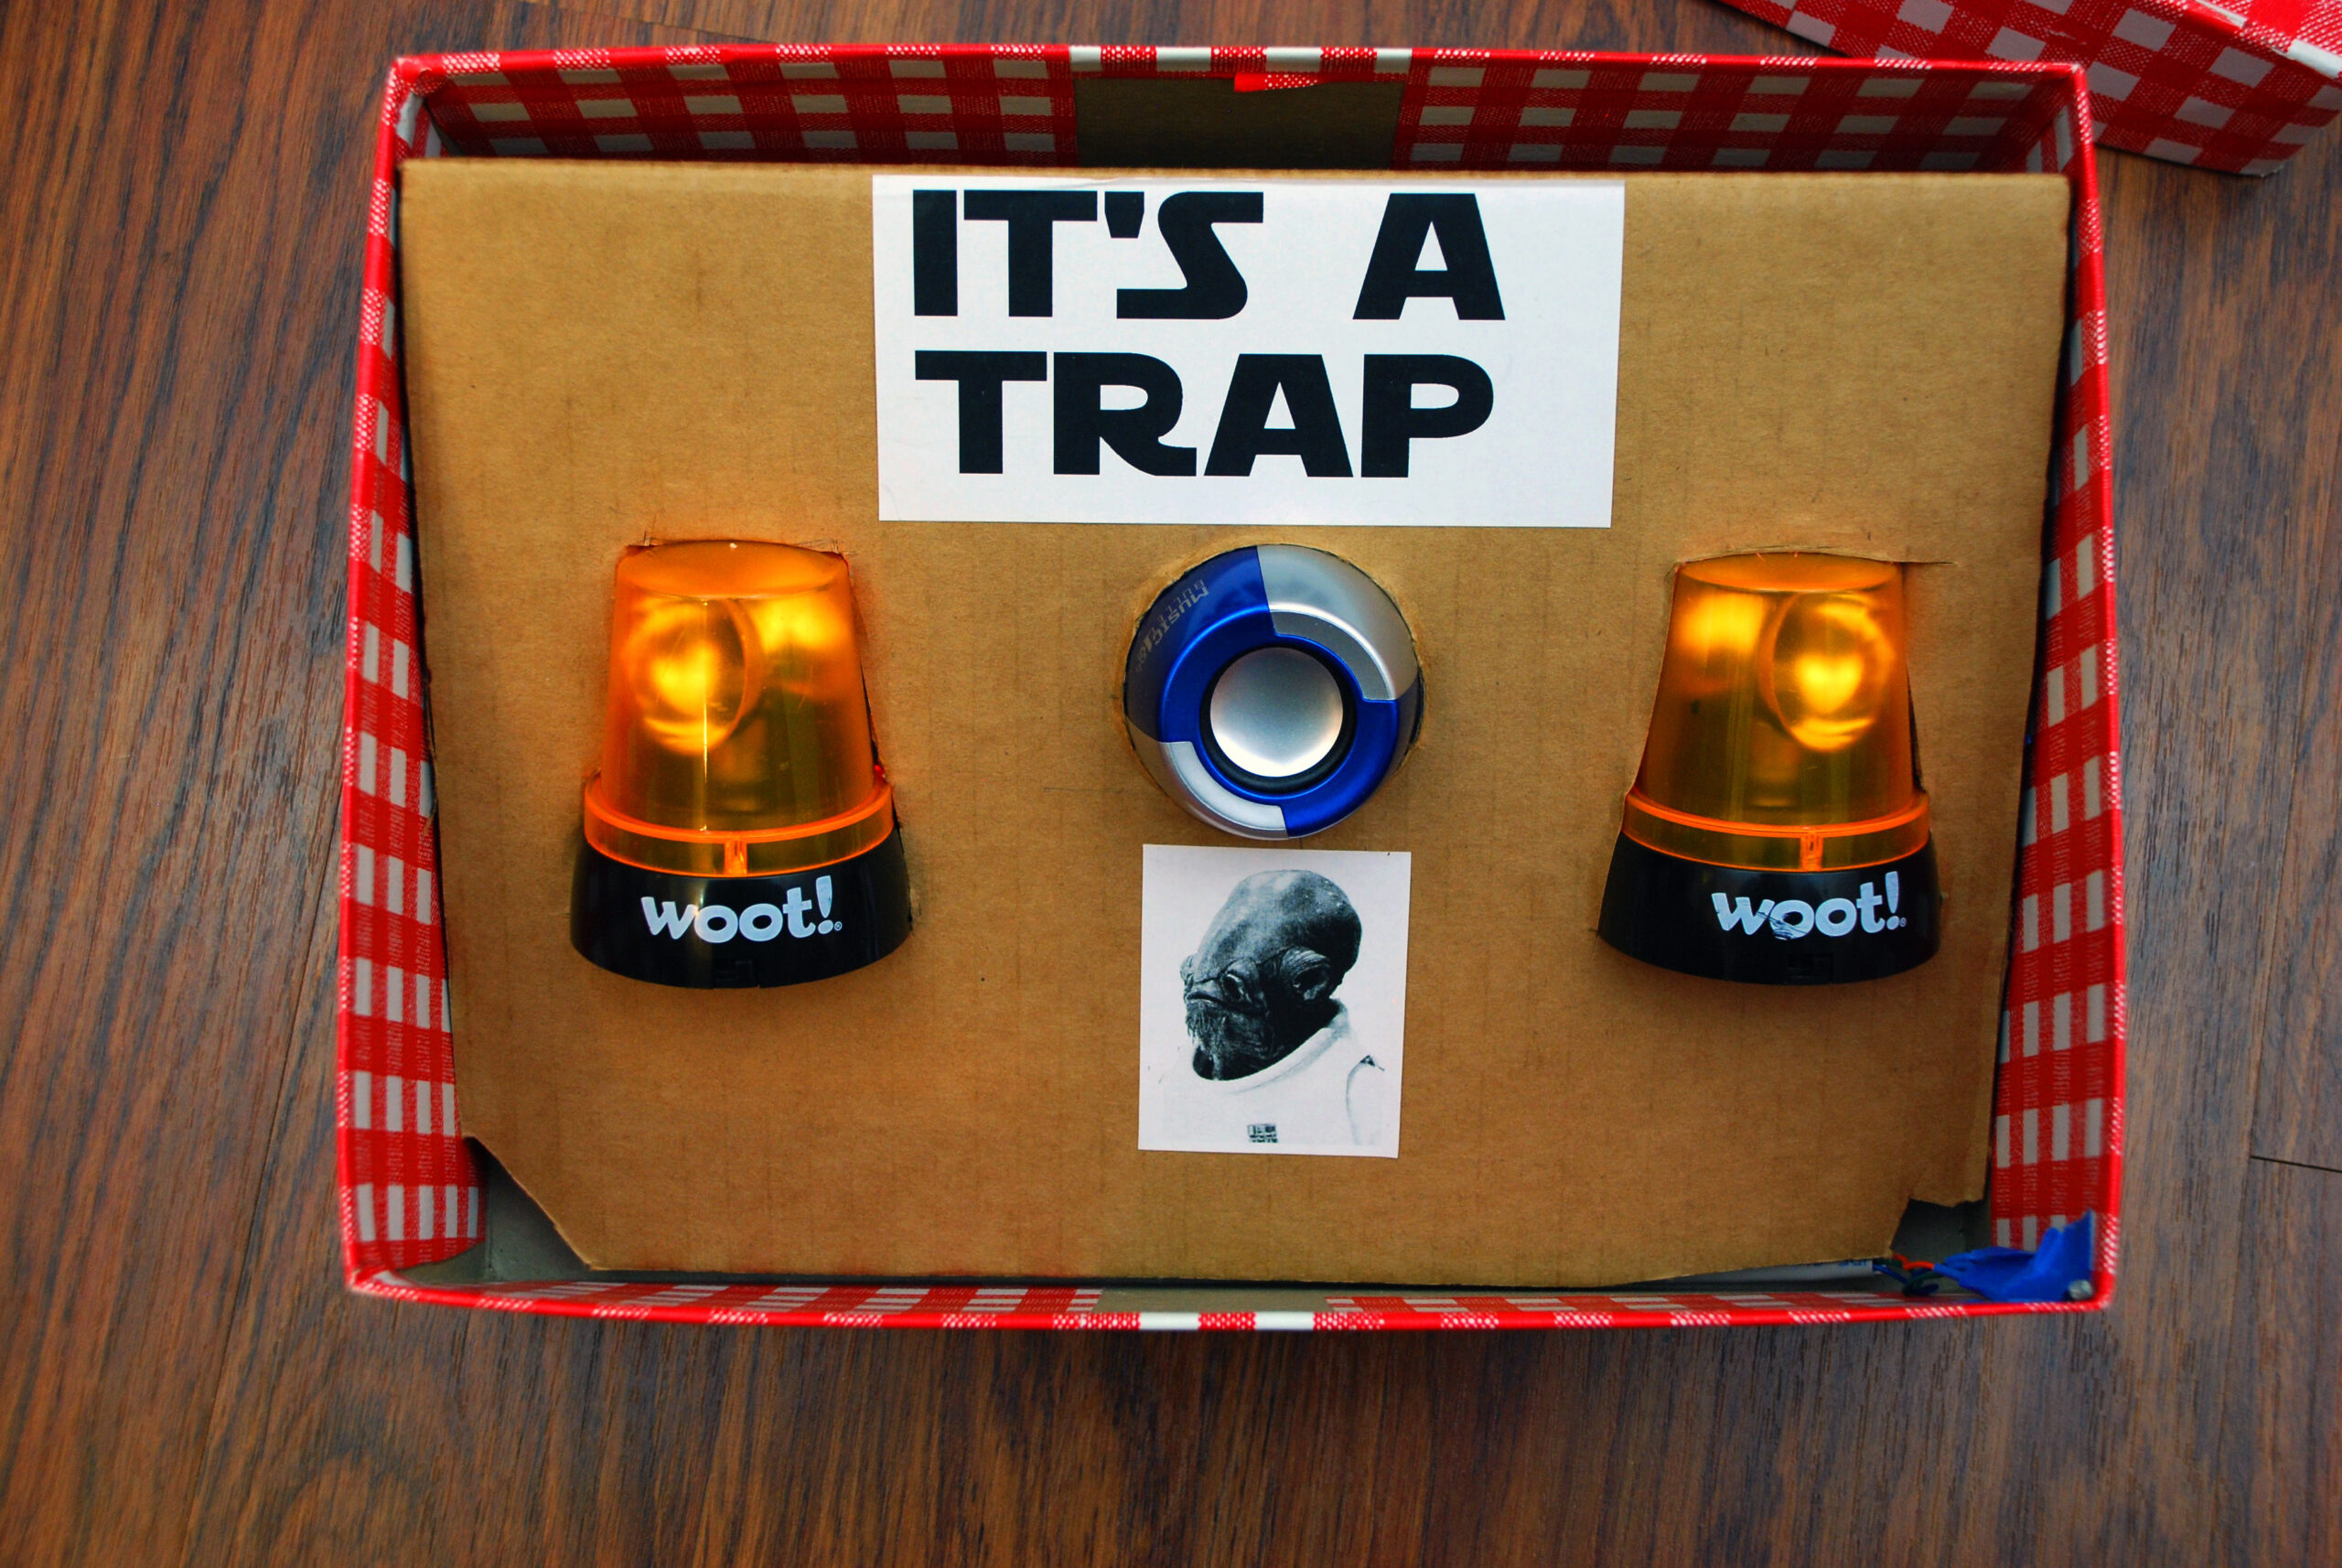
  each other a bit when it comes to gifts. It took on a rather peculiar theme a couple of years ago when my brother gave me a copy of Starcraft II. He had cleverly hidden it in a Warcraft III box and when I opened it. I did my best to express gratitude. Before I could get very far, he exclaimed in his best Admiral Ackbar “It’s a Trap!” Ever since then successive gifts have been “Traps” and I wanted to do something really cool this year. I’m not quite sure how my plan evolved, but the end-result was something along the lines of what I imagined: A box, which when opened would flash lights and emit the classic Return of the Jedi line: “It’s a trap!” I already had a number of things that would serve my purpose: An Arduino and Adafruit wave shield would be able to supply the sound clip. A pair of Woot-off lights I’d bought on a whim years ago could provide a perfect effect of a siren light.

The box before opening.
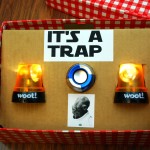
The presentation of the box with the lid off.
Woot-Off Power Problems
Woot.com is a website that sells 1 thing a day until they run out. Occasionally though, Woot will have a “Woot-Off”, a day where they sell tons of different things, each in succession until they run out of inventory. One of the mainstays of the Woot-Off is a pair of rotating siren light gifs on the page. Amusingly, Woot at some point decided to get some real-world woot-off lights manufactured. The lights are a pair of USB powered rotating siren lights. They stand at about 2.5″ and are each made of an LED, a DC motor, and plastic component that rotates on the motor providing directional control of the LED’s light. As they’re USB, I knew immediately that I could run the lights off of 5v. I also knew there was no way that the Arduino’s pins could supply enough juice (current) to power those motors. I immediately jumped into finding a solution.
First, I tried some transistors I had lying around. I had some 3904 NPN transistors. A single 3904 wasn’t enough. I knew next-to-nothing about darlington pairs, but upon my attempt, I didn’t get very far (In hindsight, I think this setup didn’t work because of voltage drop, more on that later.) I thought the problem was that I didn’t have enough current, so I tried a number of solutions. After a lot of frustration, I ended up buying a TIP-120 transistor. It’s a Darlington Power transistor intended to deliver a good amount of power for any project. I chose it after looking at a number of tutorials on powering heavier-duty devices from an Arduino. With my TIP-120, I was sure all my troubles were over.
Aside from a minor hiccup routing the power through ground instead of source, I still couldn’t get them to run reliably. The LEDs would light up, but one motor wouldn’t work all the time. After puzzling it out, I realized that there was probably a voltage problem: Every device you put into a circuit requires some amount of the “electrical pressure” provided by your power source. Using the classic water analogy, imagine you have a tank full of water, and a trough going to a water wheel. When you open the tank, water comes out and starts to force the wheel to rotate. The wheel uses up some of the energy that water has in order to turn. In the electronics world the “consumption” of voltage is called “Voltage Drop” and refers to the amount of voltage that a device needs to operate. You can usually find this information on the datasheet for the device. I was running on a 4-cell (AA) battery pack. If you’re not aware, each AA battery provides 1.5v, giving my a total of 6v. That should be enough, but if any of your batteries aren’t fresh you may find that you’re not getting what you expect. Between the transistor and my under-performing battery pack, I was probably getting 5v, but just barely. It was clearly not reliant enough to get both lights lit up and rotating.
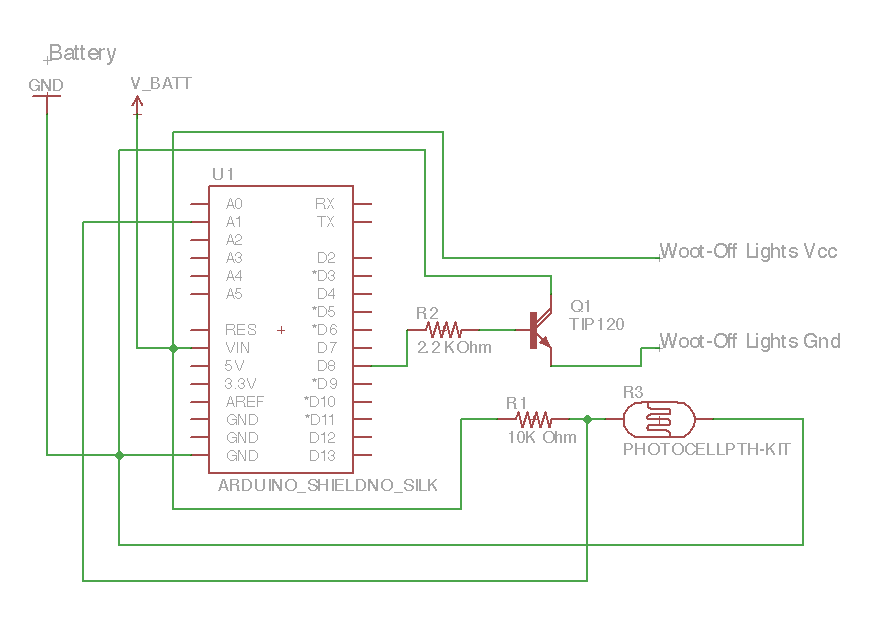
I decided to take the Tim Taylor approach: MORE POWER. When I was out picking the TIP-120 transistor, I also got an 8-cell battery pack. Now I had a slightly different problem. My lights ran on 5v. I’d seen the inside of the lights and knew there was some circuit protection, but I didn’t think going from a 6v to a 12v pack was a great idea. Applyiny 12v to the LEDs and motors would probably have burned them out after a short time. The easiest (and hackiest) solution was to improvise a 5 or 6 cell pack by putting a jumper between the last battery in the series and the end of the circuit. These packs rely on the 8 batteries to function in series to provide a full 12v. By using 5 batteries and completing the circuit, I got ~7.5v, and was perfect. I gave it a shot by attaching my battery to the Arduino and running slightly altered “Blink” program. The lights lit up and rotated for 2 seconds, went dark for 2 seconds, and then repeated. It was exactly what I was looking for.
Automatic Switch-On
Now that I had enough power to operate the lights, I needed a mechanism for making the box turn on. Initially I thought about utilizing a limit switch triggered by the lid being taken off. While it was a valid approach, I was concerned about mechanical problems. If the switch wasn’t positioned right, the whole thing would fail. Instead I decided to utilize an photoresistor. When the lid came off, the resistance on the LDR would lower and I could use that as a trigger for the Arduino to fire the event.
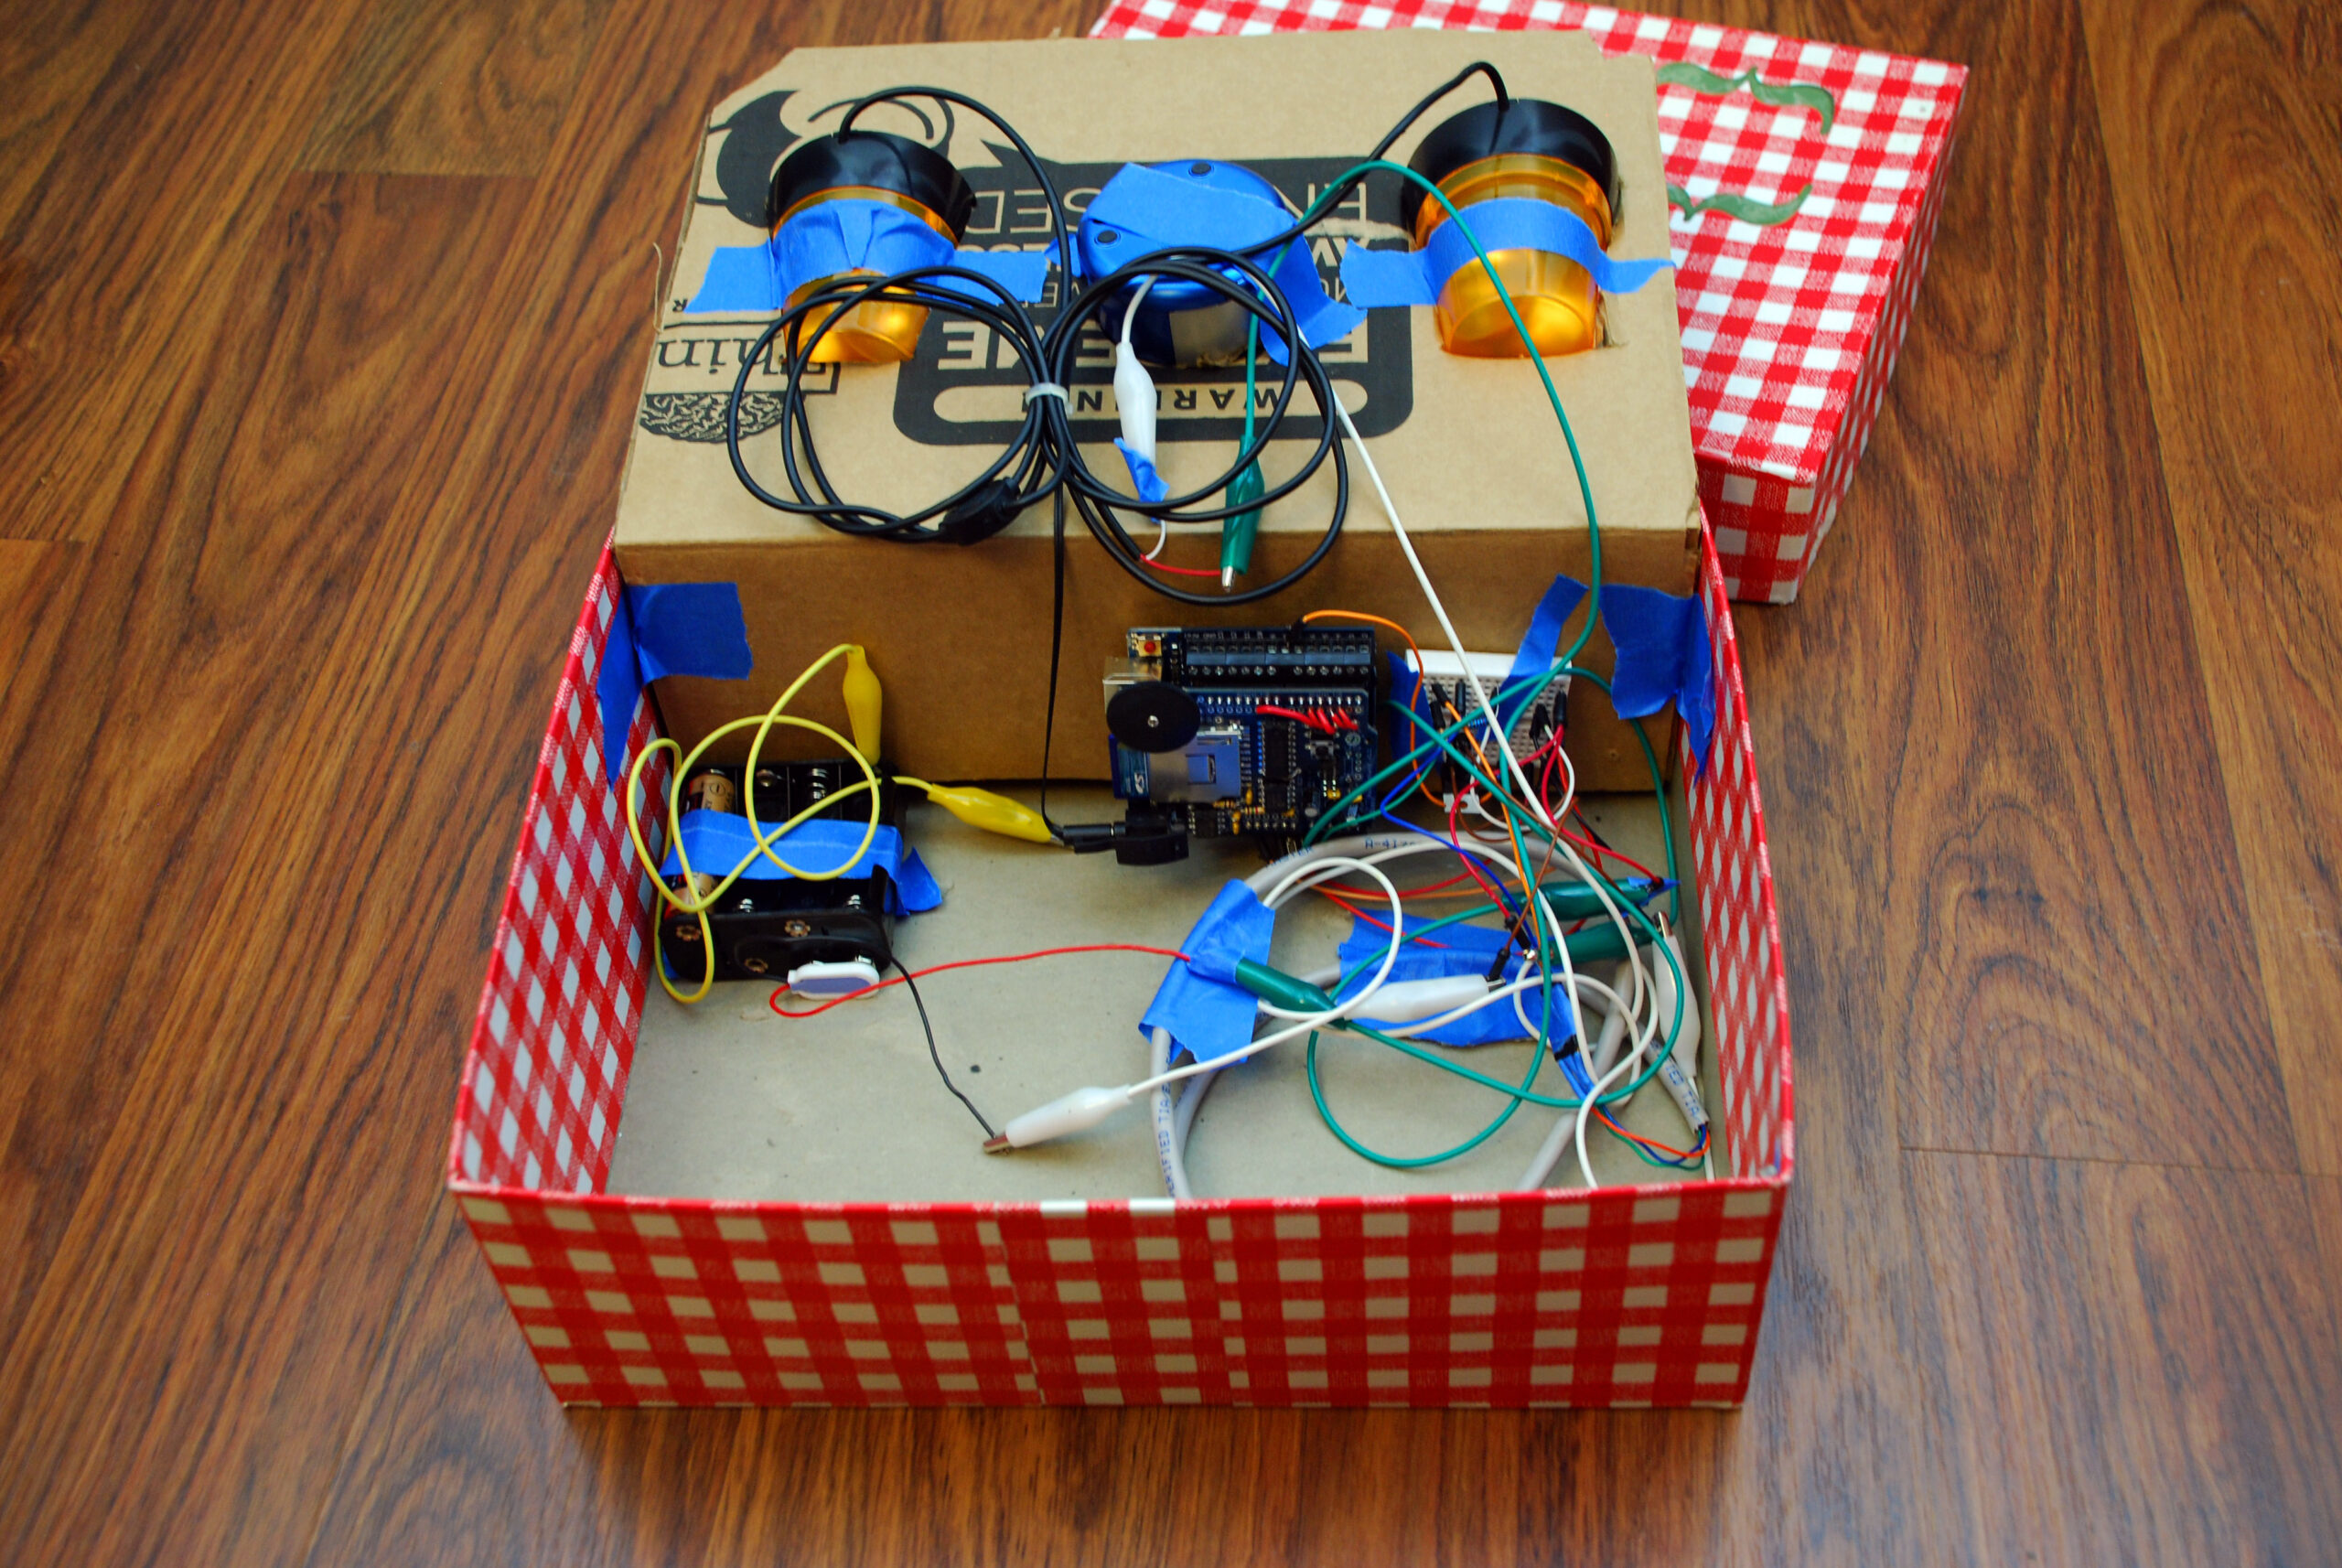
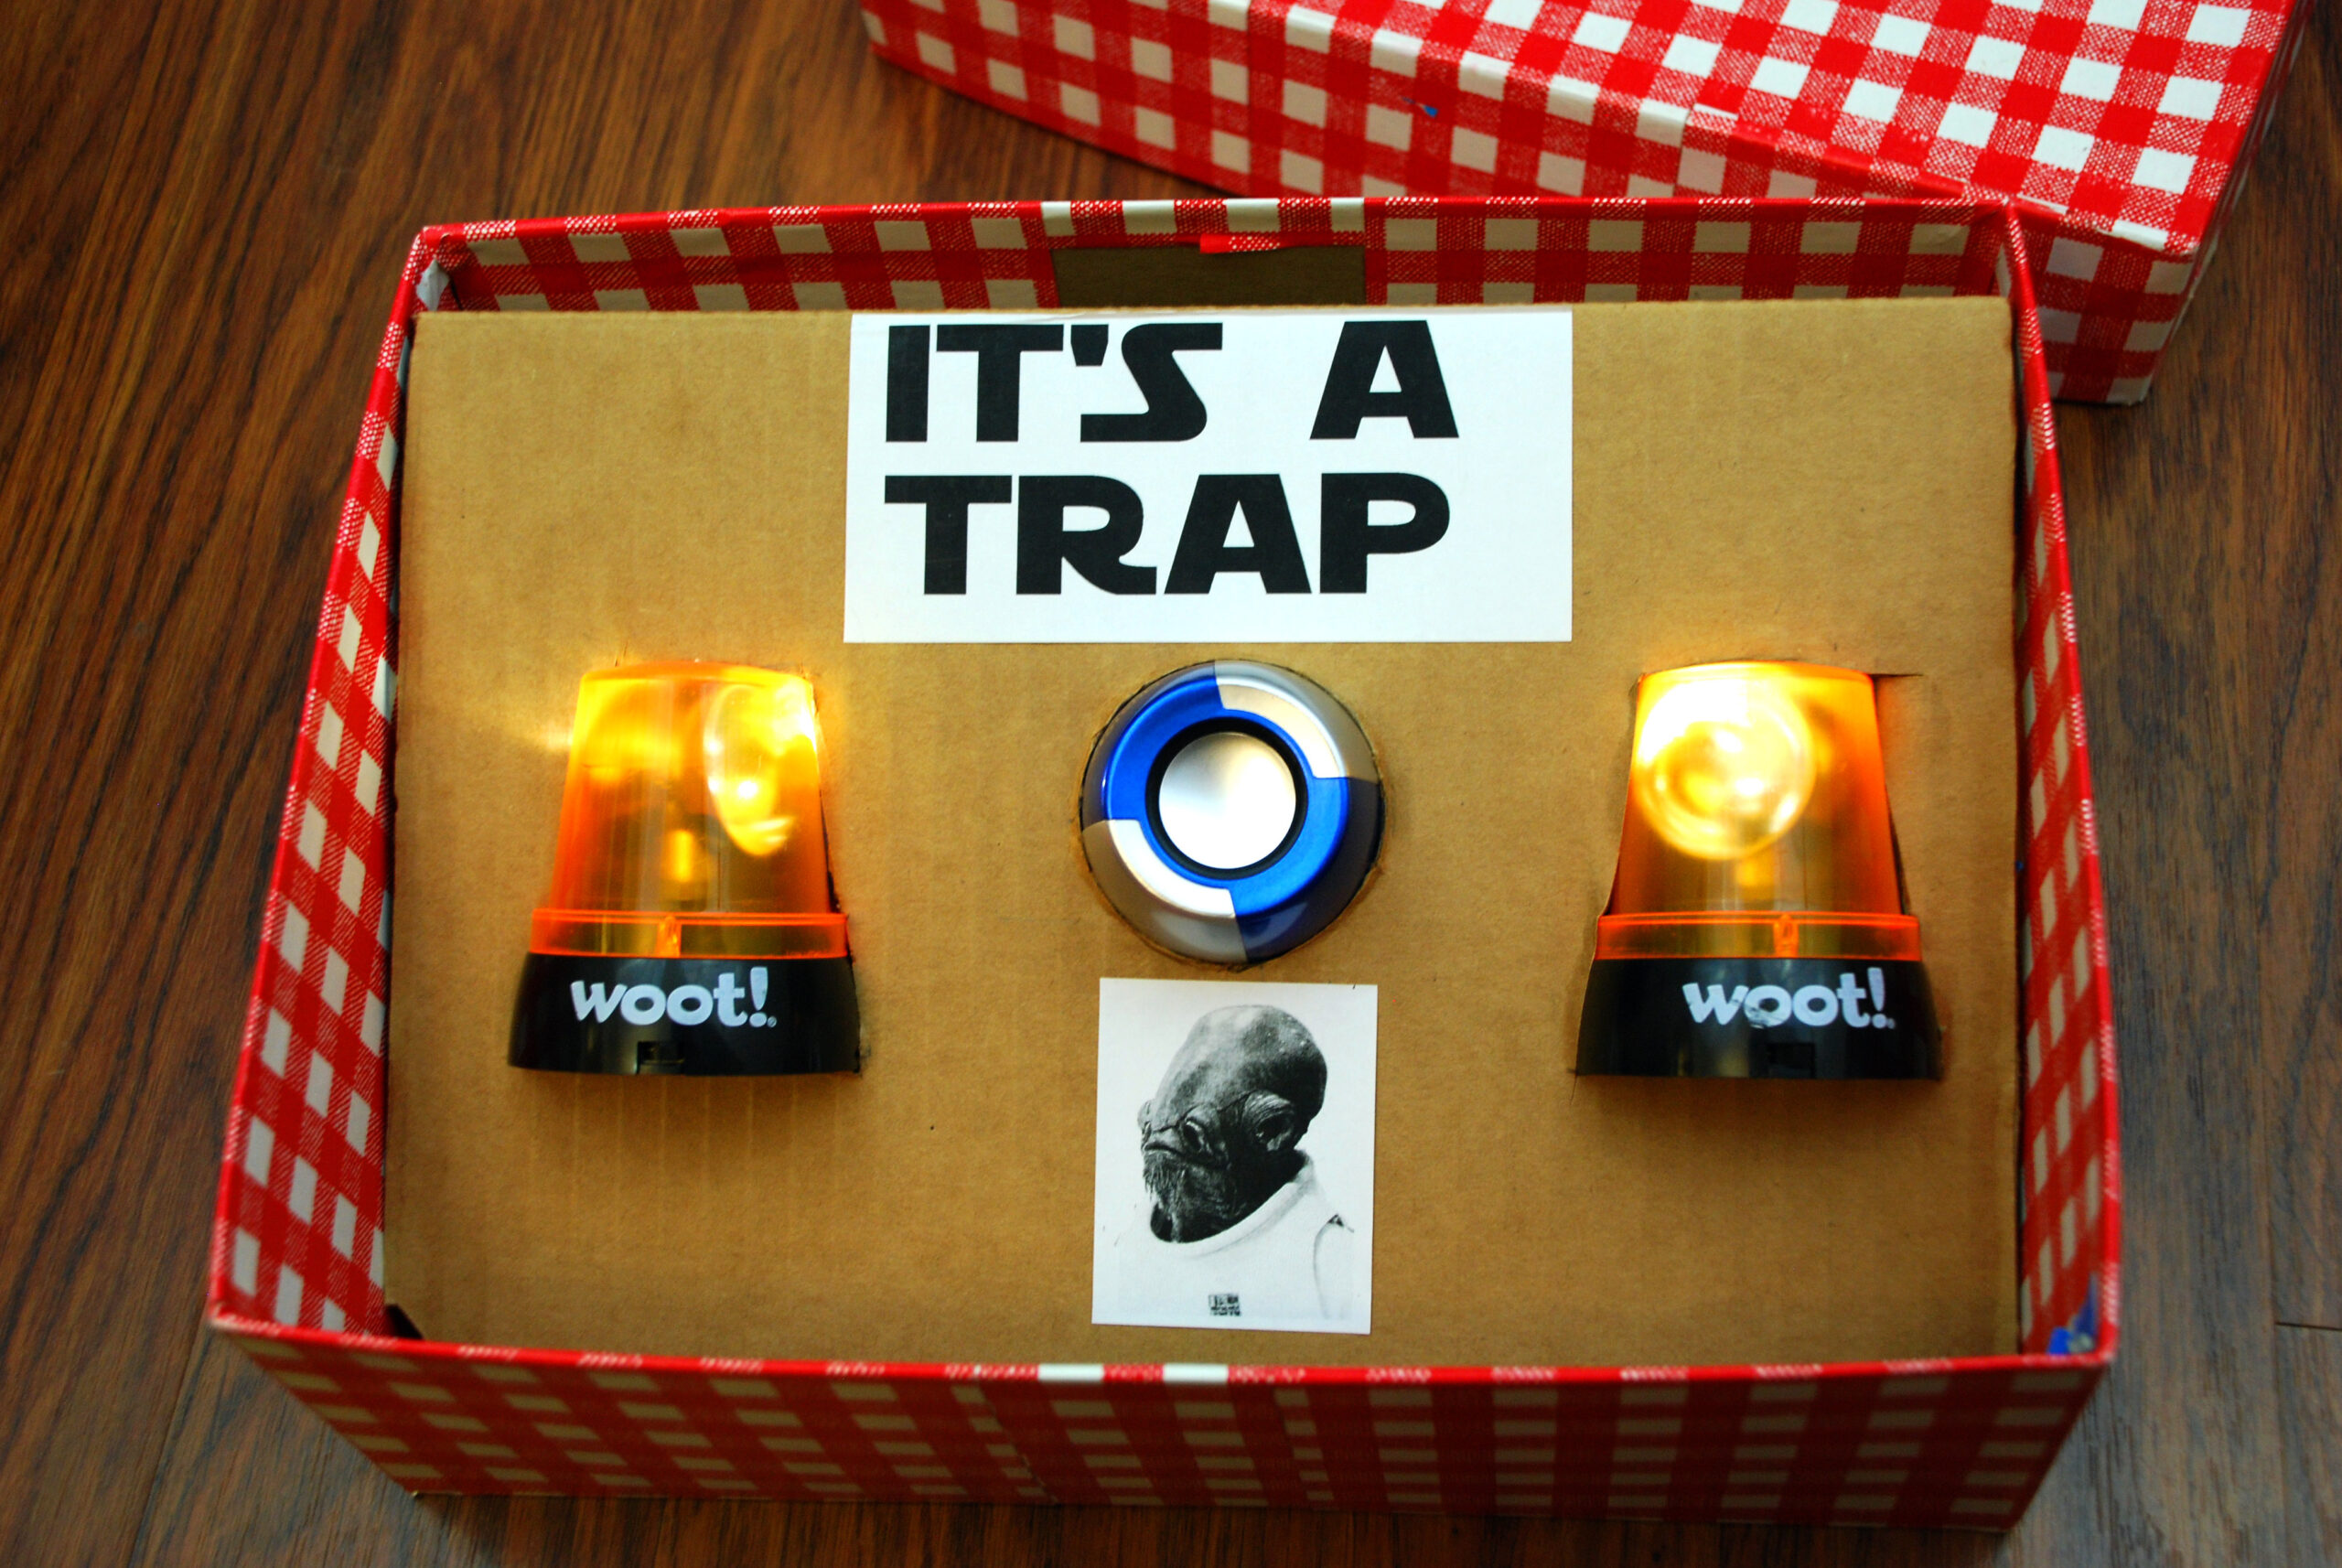
The internals of the “It’s a Trap” box. Blue Painter’s tape is a great/terrible means of mounting stuff.
The presentation
I did my best to secure the electronics in the box in some sort of orderly fashion. If I’d had more time (and planned it out a bit better) I might have actually mounted the items in the box properly. I ended up cutting apart one of the many boxes that we’d received this year to use as a mounting plate. With my calipers in hand I measured my various components and did my best to cut out holes for the speaker and the lights. The Arduino was mounted on the back with a spare of screws and nuts (yup, I bolted my Arduino into cardboard.) Beyond that, I tried to tape everything else down and isolate the alligator clips so the box didn’t short out. It’s a bit of a mess, but it was going to be a one-time deal so I didn’t want to spend too much time working on it. (Also, it wasn’t until Christmas morning that I actually finished all this up, so it was a time-crunch too)
As it was, everything turned out very well. The event fired perfectly. Here’s a video of my brother receiving it:
http://www.youtube.com/watch?v=48EGciIDQzM
As a endcap to this, the expression on my brother’s face and his reaction is probably the best Christmas present I could have asked for.
If you’re interested, File Downloads here (The code portion is really hacked together from existing adafruit code, just a warning):
[prettyfilelink type=”ino” src=”http://aaroneiche.com/files/2013/01/itsatrappresent.ino”]Arduino Code[/prettyfilelink]
[prettyfilelink type=”sch” src=”http://aaroneiche.com/files/2013/01/trapbox.sch”]Circuit Schematic[/prettyfilelink]
As you may have noticed above by the icon, I showed off my project on Adafruit’s “Show and Tell” show last Saturday night. You can view that here.
That’s awesome!