Way back in October or something, a coworker of mine asked if I had a glue gun he could borrow. He was in town from the UK for a couple of months, and was interested in building a PiCart – a video game emulator packaged in an NES game cart. Rather than give him a glue gun, I suggested we do a group build and invite anyone in the office to make one. A bunch of people did, and I started mine, but never finished it. Until this weekend…
Because many sites have written and described how to make these, I’m not going to go over it again, I will simply add a few notes about my own experience.
Here is the interior of my (using Nintendo’s verbage): GamePak™ :
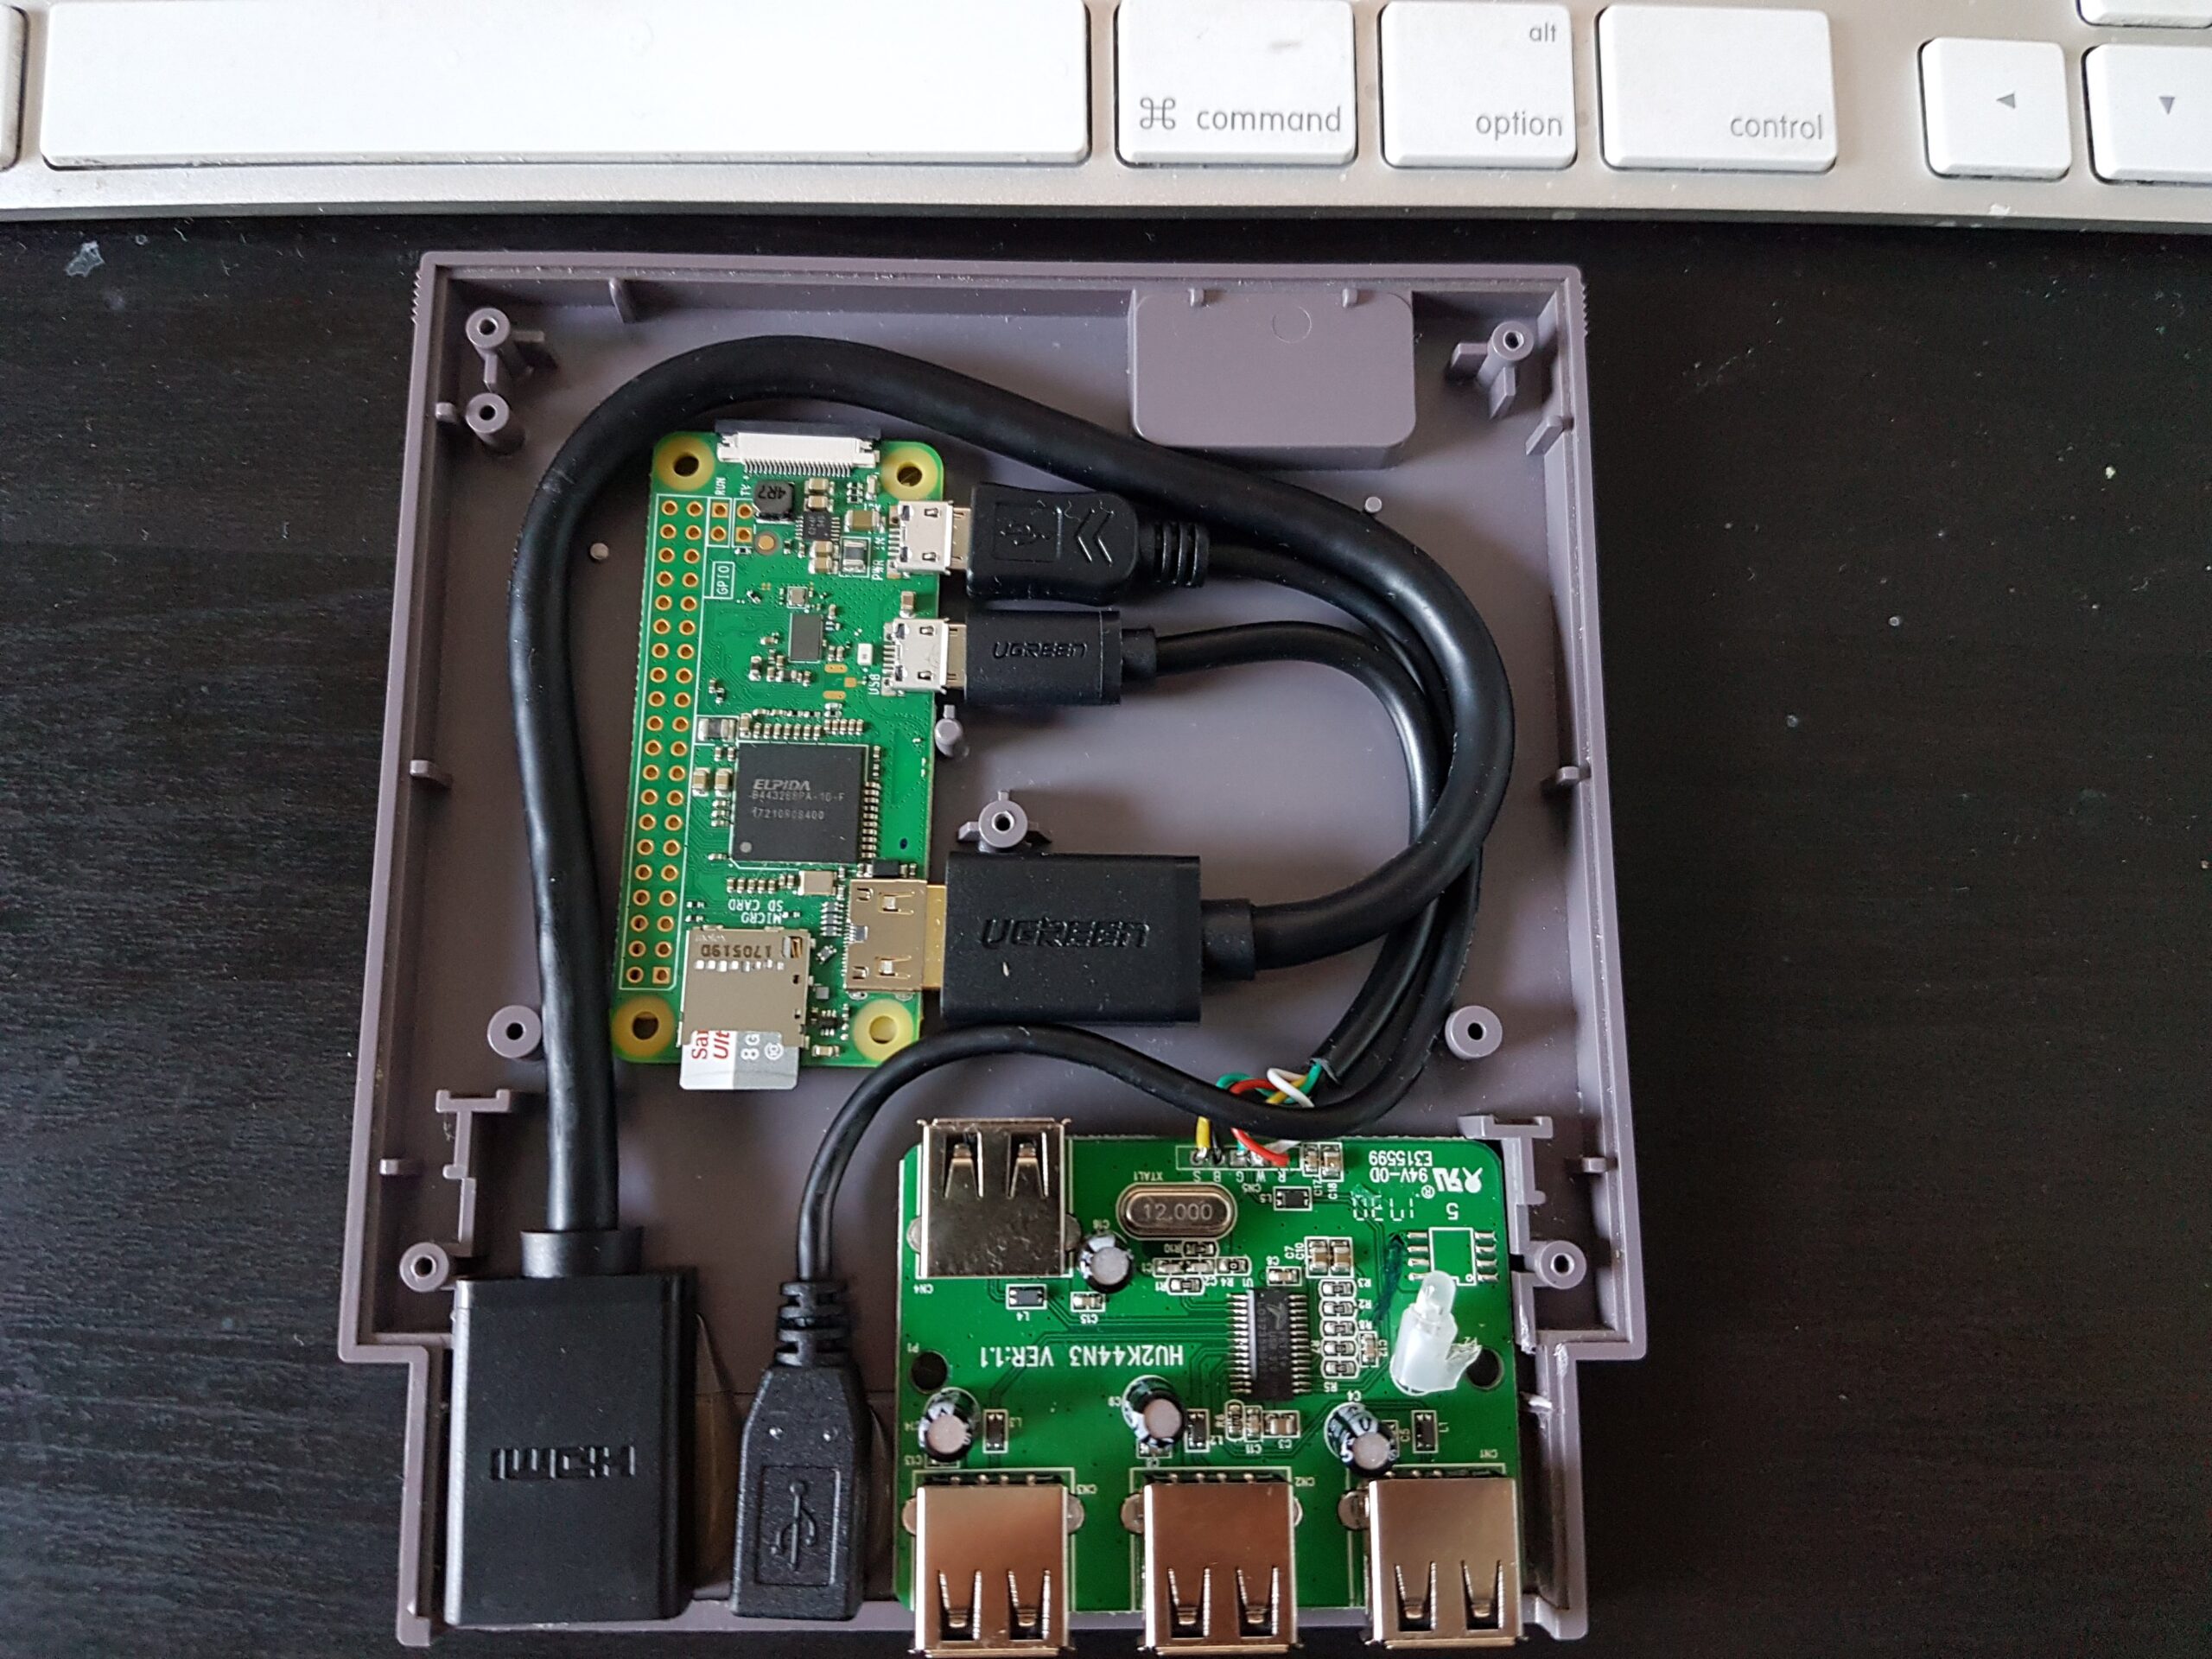
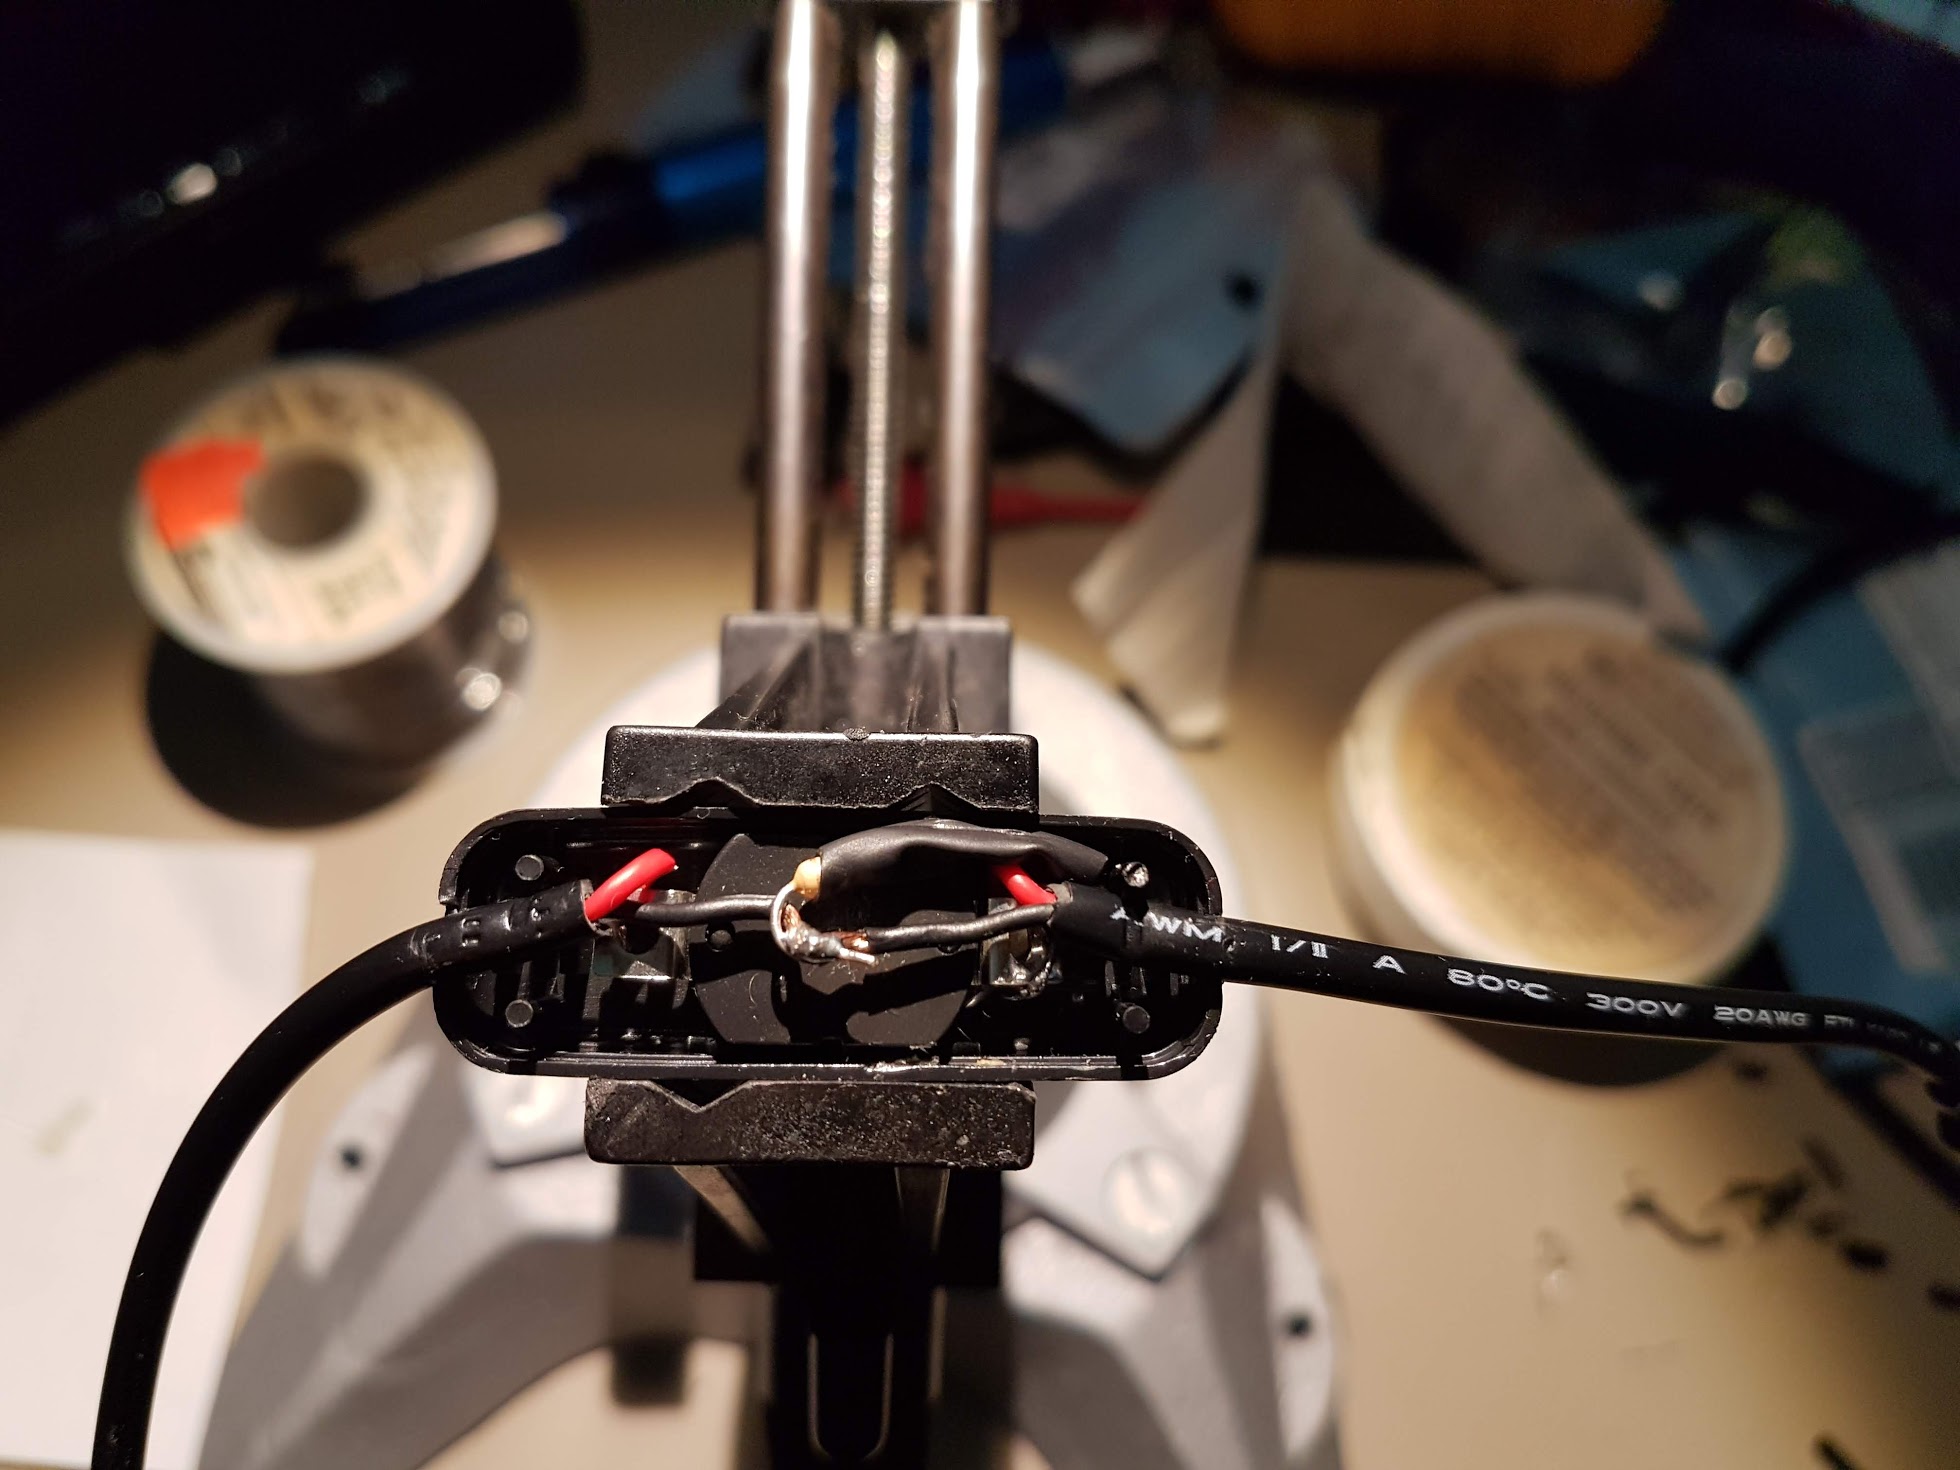
- Instead of using an adapter, I clipped a USB-micro cable, and soldered the ends directly on to the USB hub. This was difficult as the ground plane for the hub is huge – it acted as a giant heatsink making it difficult to get the solder to reflow.
- I used at 8GB card, instead of something bigger. Right now I’m just playing Nintendo games, but if I were to go for something more substantial, like PlayStation stuff, I might need more space.
- I ended up removing the outer jacket a bit more on the hub cable to make the wires lay flatter. I’d like to do the same with the HDMI cable, but the shielding on that cable is important.
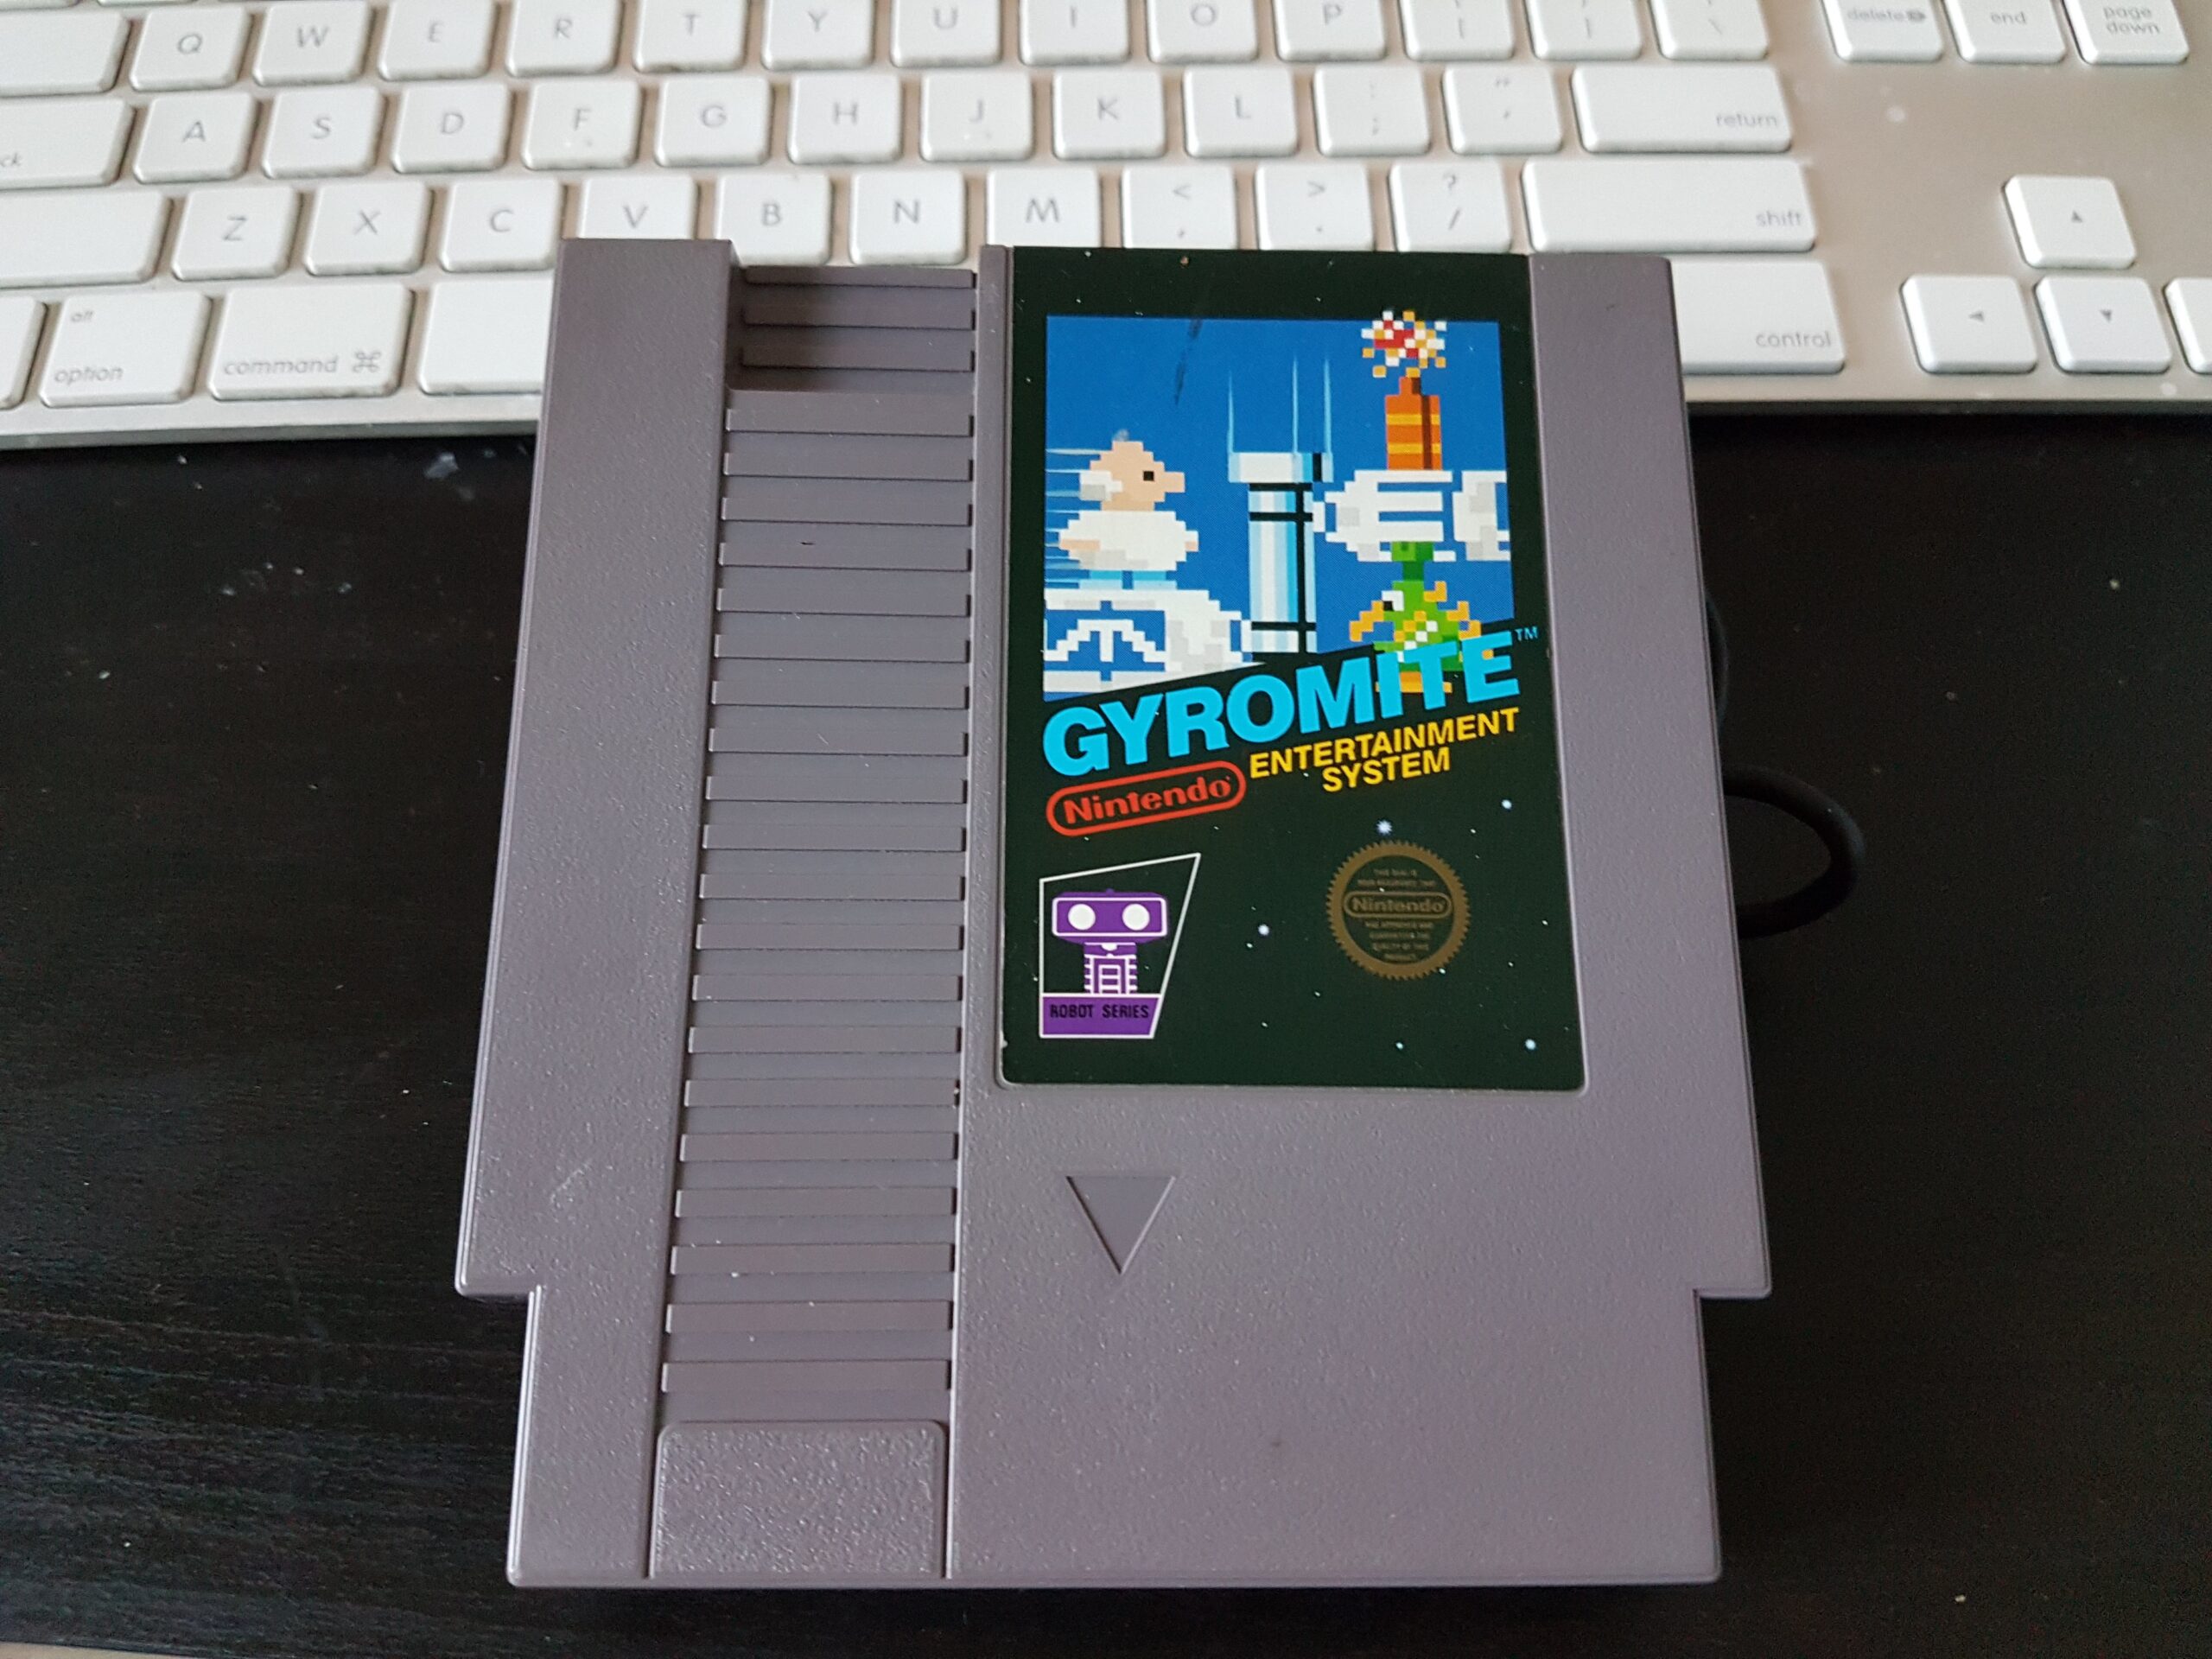
Initially I’d bought a cartridge that was sort of a coppery-color, but when faced with making the decision, I realized that I was really interested in having the Gyromite cart – probably because it had something to do with ROB.
Though I initially bought a wireless bluetooth gamepad for my cart, I found it did not connect well, or reliably, and configuration was a real pain. I eventually spent $15 on an Xbox 360 USB receiver, and have now setup my 360 controller with RetroPie. I contemplated fitting it in the box, but I don’t think there was any room. If I got a shorter, flatter HDMI cable, I might be able to make it work.
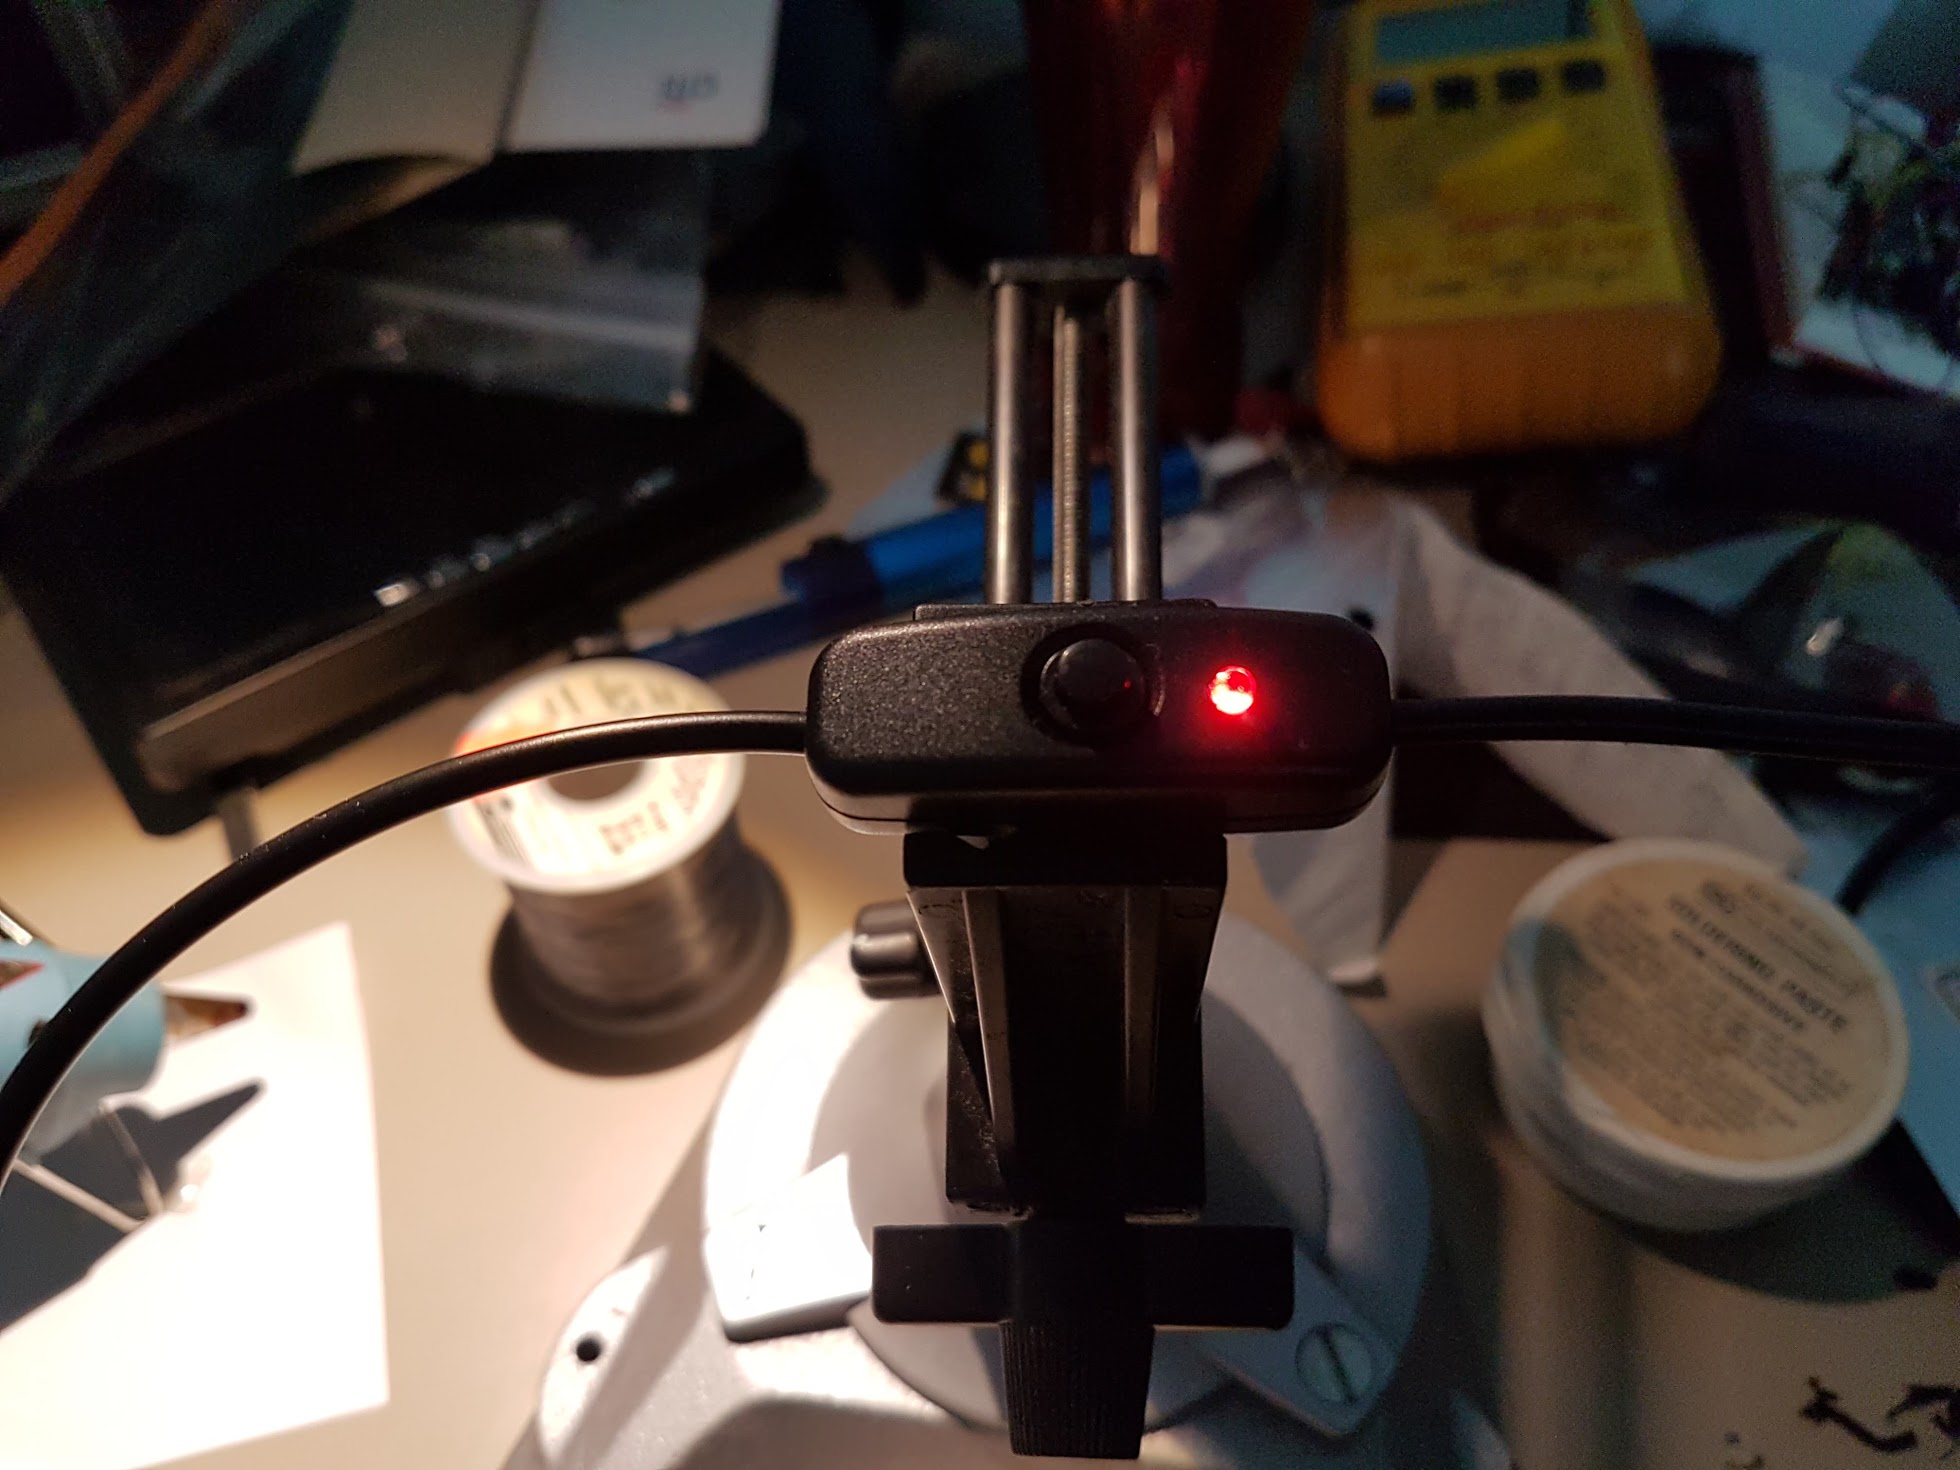
As a final note, the USB micro power supply I brought had a switch on it, which was really great, but it was strangely button-up-is-on, rather than pressed-in-is-on. To clarify, I decided to add an LED to the switch. It required drilling a hole in the case, adding a resistor, and soldering the leads to the tabs. I had a couple of false starts getting it all to fit. I eventually added some heat shrink to one lead.
So far, I’ve really only played Mega Man 2. It’s one of my favorite games of years gone past, and I’m really impressed with how much Capcom designers described with 3-color sprites. In a lot of ways the project was more interesting than the end result, but don’t they always say it’s about the journey, not the destination?