Like you no doubt, I’ve come across animated holiday light displays on YouTube, and occasionally around my neighborhood, and looked on with some envy. Not this year! This year I pursued a simple, but ultimately functional computer-controlled holiday light display of my own.
If you hadn’t noticed, Christmas lights went up a little early this year, at least where we live. People had lights up as early as November 21st. I think it was partially because that weekend was relatively dry, and partly because the pandemic this year spread some desire to make things nice. Somewhere in there I got the idea that maybe I could do something with some LEDs. I’ve been messing around with WS2812 LED strips for a while and it turns out that’s what a lot of folks use for animated holiday displays.
I planned a few items out, but my wife, Hykel, strongly encouraged me to start small and try for something just – simple. So I decided to pursue some arches. Arches are kind of fun because they are a shape that offers a lot of options. I decided that I would build 5 arches at first.
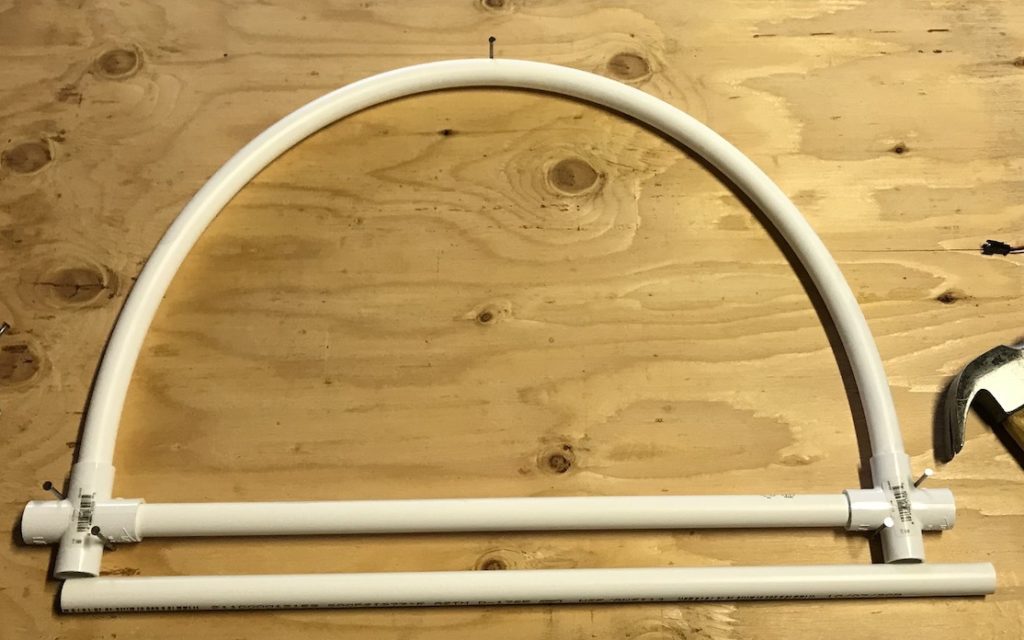
Arches
Online I learned around a translucent plumbing tube called PEX. This tubing was really perfect for my Arches because of how it would diffuse light, and how it (conveniently) would fit well into PVC pipe – a fantastic prop construction material.
Building the arches was more time consuming than I expected. The most difficult part was getting the PEX to push into the PVC connectors – the connection was just a little too tight. I ended up heating the PVC with a kitchen blow torch and widening the opening a little.
Once the arch shape was constructed, I had to put the lights in – this involved some sort of weatherproofing. I had previously settled on a set of IP67 rated LED strips. I found in the Christmas Light display community that the recommendation was to buy all your Lights from the same vendor – ensuring that the color control you get matches across the board. I went with a company called BTF-Lighting. I had been leaning towards the 12v strips – wanting to avoid issues related to voltage injection, but the 12v strips (based on the WS2815) were nearly double the price of the 5v (WS2812b). In retrospect, I kind of wish I’d spent the extra money, but I didn’t have enough experience at the time for that.
I cut, desoldered, and replaced the stock connectors with more robust connectors I got from the company that supplied the LED strips. This proved challenging just from the perspective of making sure I had the connector on the right side, and the soldering job was solid. I did more work here than I could have, had I been paying better attention.
Controller
My controller setup went through a couple of iterations. This is my first version: a decidedly janky, taped together PSU and microcontroller.
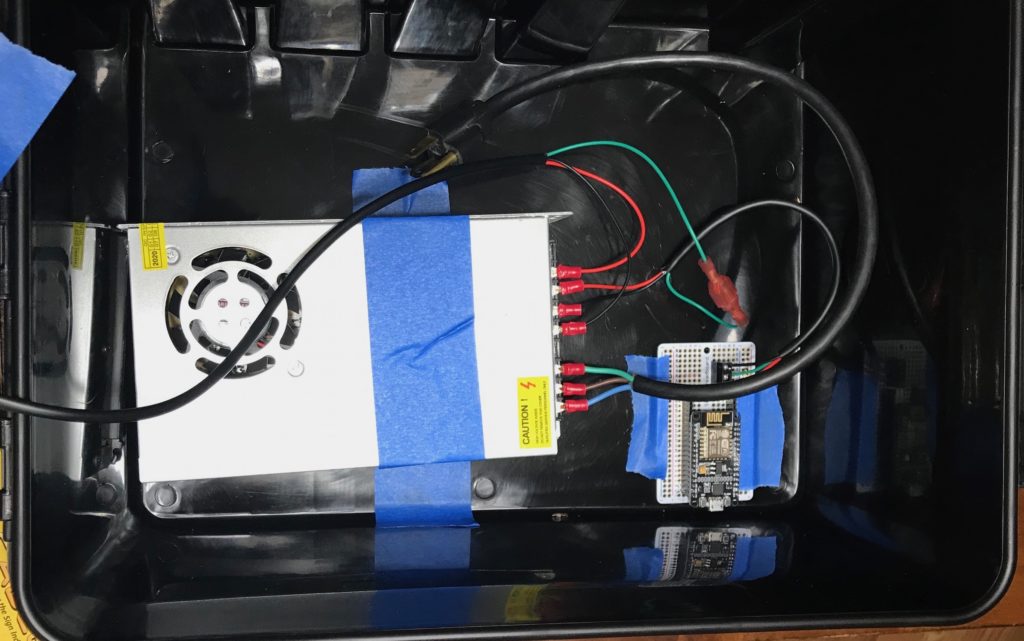
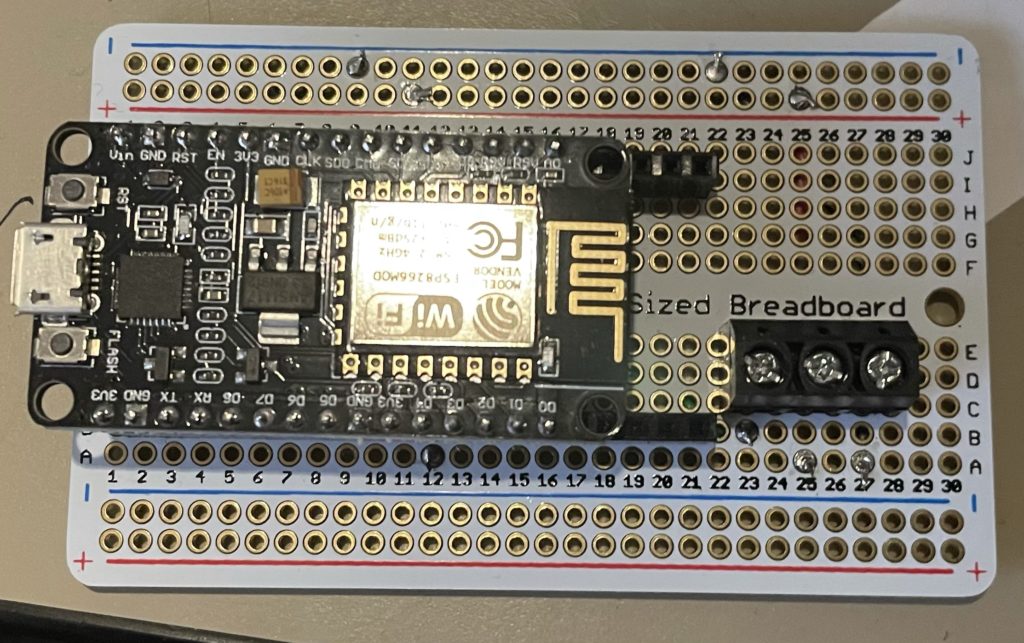
The microcontroller here is a run-of-the-mill v2 ESP8266 NodeMCU module. You can find them easily for cheap all over the place. They’re very easy to work with and I’ve had a lot of recent experience with them, so I decided to use one. I went with the very popular ESPixelStick firmware. I was concerned that I would need to use the companion ESPixelStick hardware as well, but it turns out that the module itself is enough to run it. The 120v mains input goes into the power supply, and the 5V supply powers the Microcontroller – Another supply line goes out to the arches, but the data line is paired between the two cables for convenience.
Unfortunately, the ESPixelStick firmware can’t do a lot on its own. It’s explicitly intended to be a receiver/controller for E1.31 control signals – it has some test support built-in, but that’s just if nothing else is running. This meant adding a sequence player and scheduler. Enter the mighty Raspberry Pi.
My Raspberry Pi 3b runs FPP – Falcon Pi Player – which manages sequences that you provide and schedules to play them. Using FPP makes it really easy to manage the lights – better than simply plugging and unplugging at the end of the night. In this setup, the Pi lived in my office, and the controller lived in a box on my deck, just on the other side of my display.
While contemplating adding some lights to my display, I realized the Pi could drive the Arches directly. If I moved the Pi into the box, I could remove the PixelStick entirely. So I did.
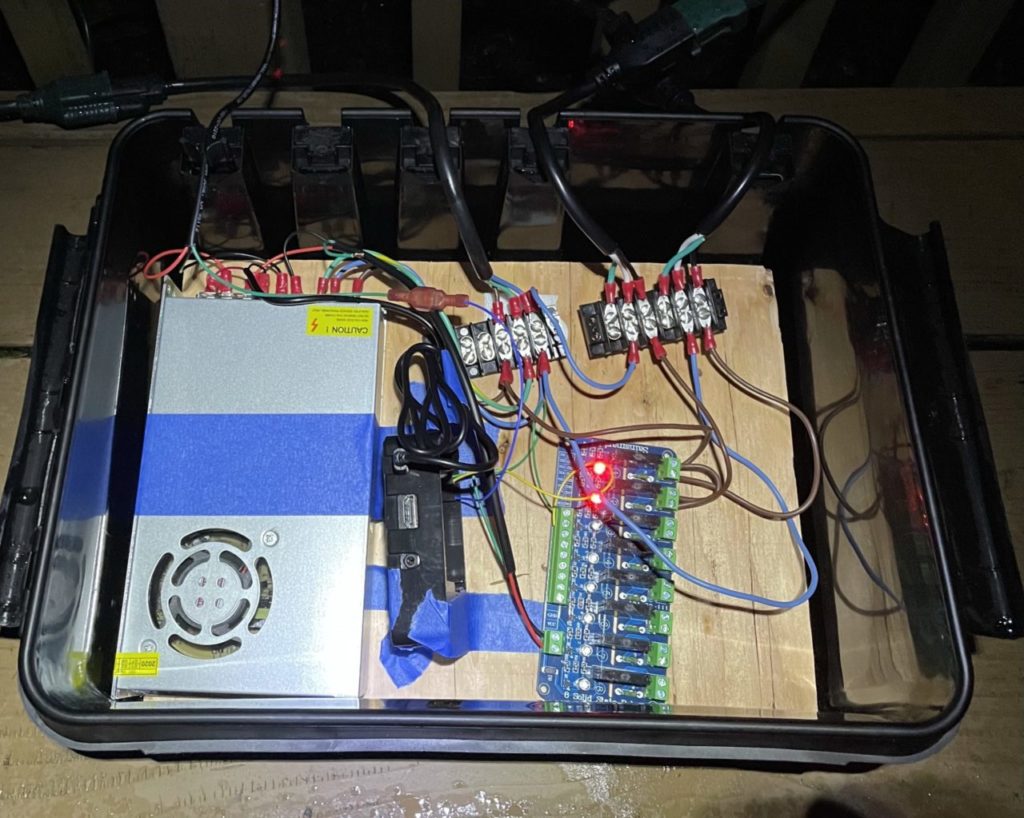
The Raspberry Pi is here in the middle, between the Power Supply and a Solid State Relay controller (more on this below). Now the Raspberry Pi drives the Arches Data line from one of its PWM GPIO pins.
Once I got the Pi driving the Arches, I had one more thing I wanted to tackle. Hykel had wrapped a couple of our trees with some spare lights we had, and I wanted to be able to turn them off without just powering them down. All the lights and controller were getting power from the outlet on the house – so this would be a big step forward in managing the setup.
For relatively cheap ($20) you can get a controller with 8 solid-state relays on it. This is great for switching larger loads (like 120V) with a 3 or 5v microcontroller or microcomputer. Being solid-state you can even use it to dim lights via PWM. I got one of these controllers and wired it up to the Pi using some of the GPIO pins that wouldn’t be driving the RGB lights. The other side of those relays is connected to the Line (Hot) wire. When the relay is switched on, it provides a complete power output on a couple short output cables. (In retrospect, I wish I would have gotten 2ft extensions, instead of 1ft, these would have provided a little more convenience in my setup.
Sequencing:
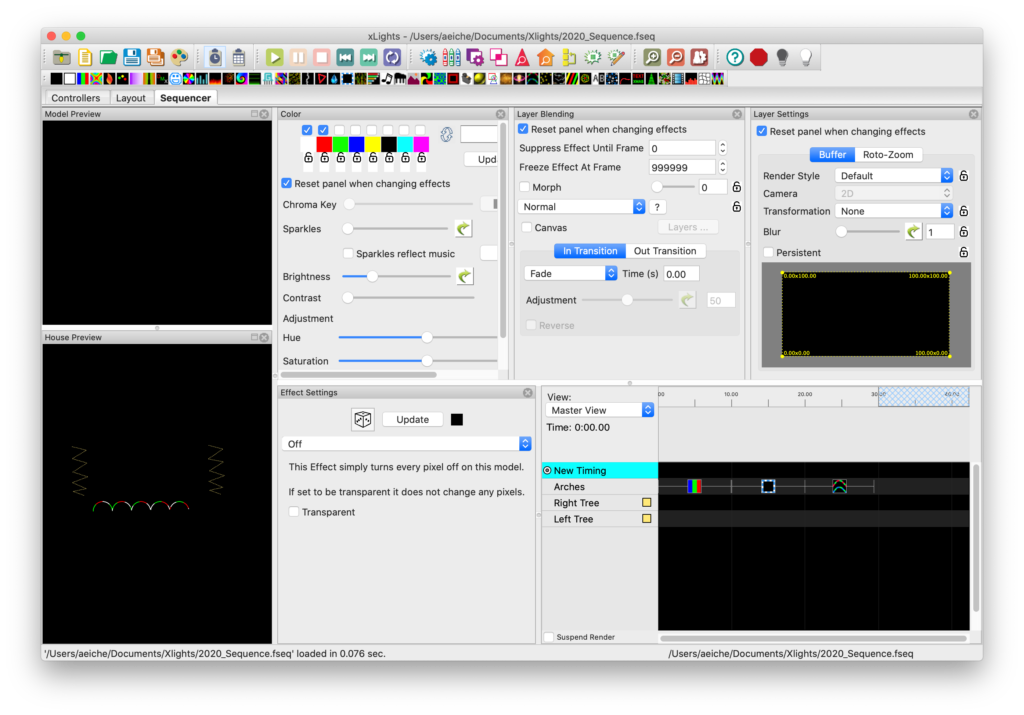
The last step in all this is something to actually display. Because you’re not just turning on and off lights, you need data to determine when the lights go on and off – a sequence. For that I used a really impressive piece of software: xLights.
XLights is open source, and provides Light design and Sequencing for this kind of setup. It supports a wide variety of technologies so it could conceivably be used for a lot more than just Christmas lights. Here’s a screenshot of my design in the software:
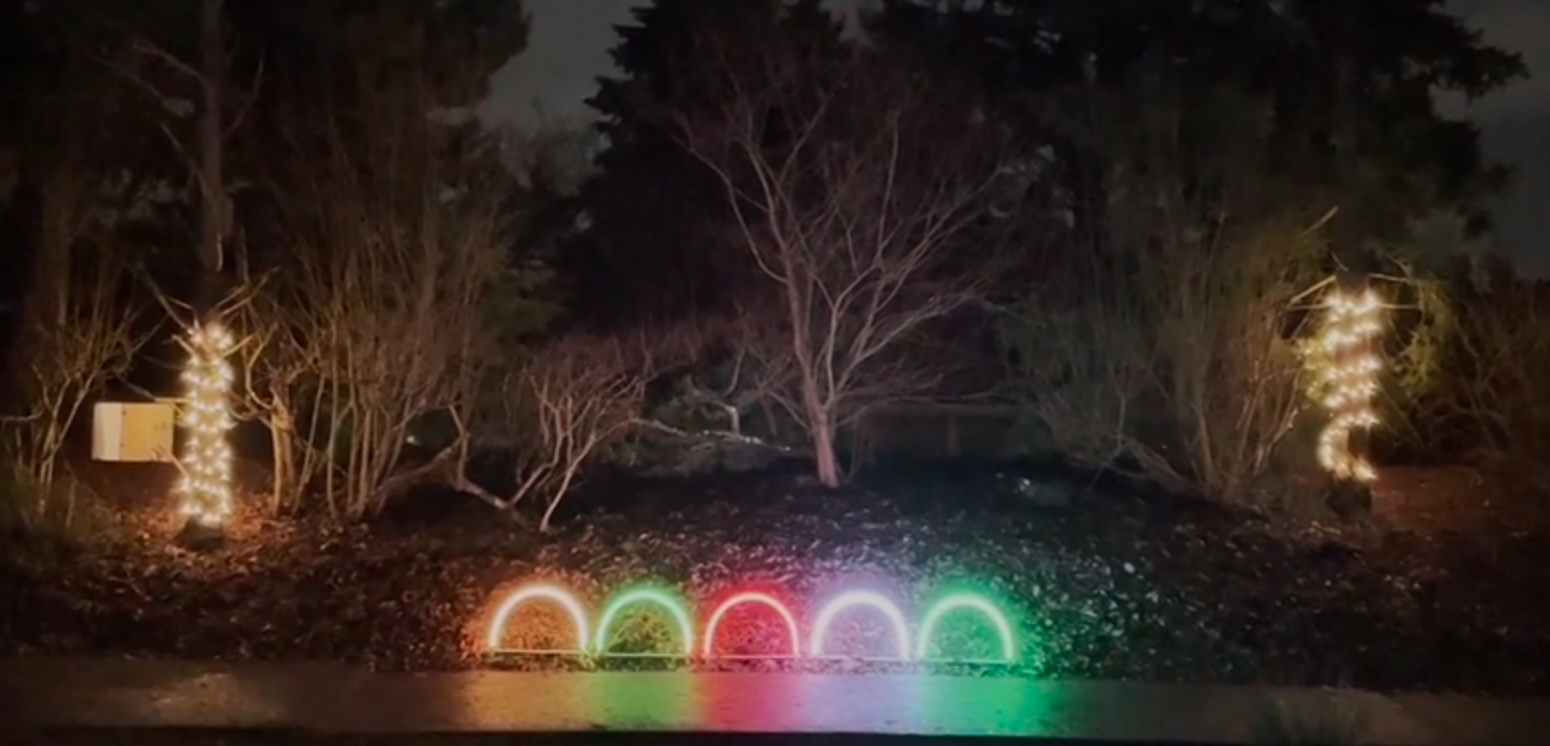
The Final Product:
Here’s my display in all its glory – this includes changes that were made late Christmas Eve (and possibly very early Christmas morning)
That video was so cool!
Awesome! The boys just started programming classes. I wonder if they’ll be ready to do something like this for next Christmas!